Managing employee departures can be challenging, especially when it comes to ensuring smooth communication. One essential task is setting up auto replies for departing employees to inform contacts of their departure and provide alternative contact information. Here’s a step-by-step guide on how to do this in Google Workspace.
Why Setting Up Auto Replies for Departing Employees is Important
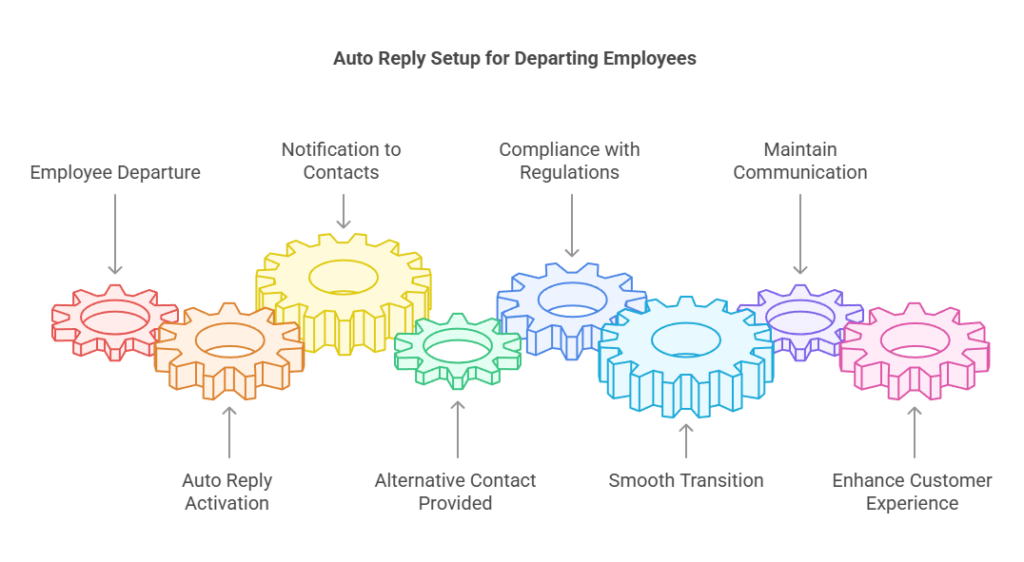
Setting up auto replies for departing employees is crucial for maintaining professionalism and ensuring seamless communication. Auto replies inform contacts about the employee’s departure and provide alternative contact information, preventing communication gaps and enhancing customer experience. This practice also helps in complying with data privacy regulations and managing transitions efficiently, ensuring that important messages are redirected appropriately and business operations continue smoothly.
By understanding the importance of auto replies, you can handle employee departures with professionalism and efficiency, minimizing disruptions and maintaining trust with both internal and external stakeholders.
Prerequisites for Setting Up Auto Replies for Departing Users
Here is what you should keep in mind before you can set up auto replies for departing users in Google Workspace:
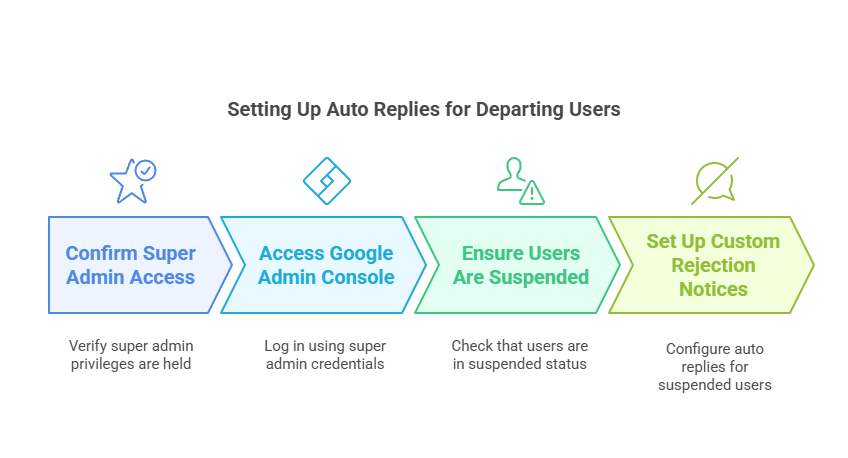
Super Admin Access: This task can only be performed by a super admin. Ensure that you have super admin privileges in your Google Workspace account.
Access to Google Admin Console: You need access to the Google Admin Console to configure the necessary settings. Make sure you can log in to the Admin Console with your super admin credentials.
Suspended Users: The users for whom you want to set up auto replies must be suspended. Only suspended accounts will trigger the custom rejection notice.
Once you have confirmed these prerequisites, you can proceed with setting up custom rejection notices for suspended users.
How to Suspend Users in Google Workspace
Here’s how to do to suspend the user accounts before setting up auto replies:
Step 1. Sign in to Google Admin Console: Log in to your Google Admin Console using your super admin account.
Step 2. Navigate to Users: Go to Menu > Directory > Users.
Step 3. Find the User: In the Users list, locate the user you want to suspend. If you need help, use the search function to find the user account.
Step 4. Suspend the User: Hover over the user’s name, click on More options (three vertical dots), and select Suspend user. Confirm the suspension by clicking Suspend.
NOTE: Suspending a user in the Google Admin Console temporarily disables their account, preventing them from accessing Google Workspace services while preserving their data and settings. This is useful for situations like extended leave or disciplinary actions. Deleting a user, on the other hand, permanently removes their account and all associated data from your organization, which is typically done when an employee leaves the company permanently and their data is no longer needed.
How to Create an Auto-Reply for Suspended Users
Prerequisites:
Super Admin Access: Ensure you have super admin privileges.
Access to Google Admin Console: Log in to the Admin Console with your super admin credentials.
Suspended Users: The users must be suspended to set up auto replies.
Step-by-Step Guide
Step 1. Create a Group: Add the suspended users as members of a new group.
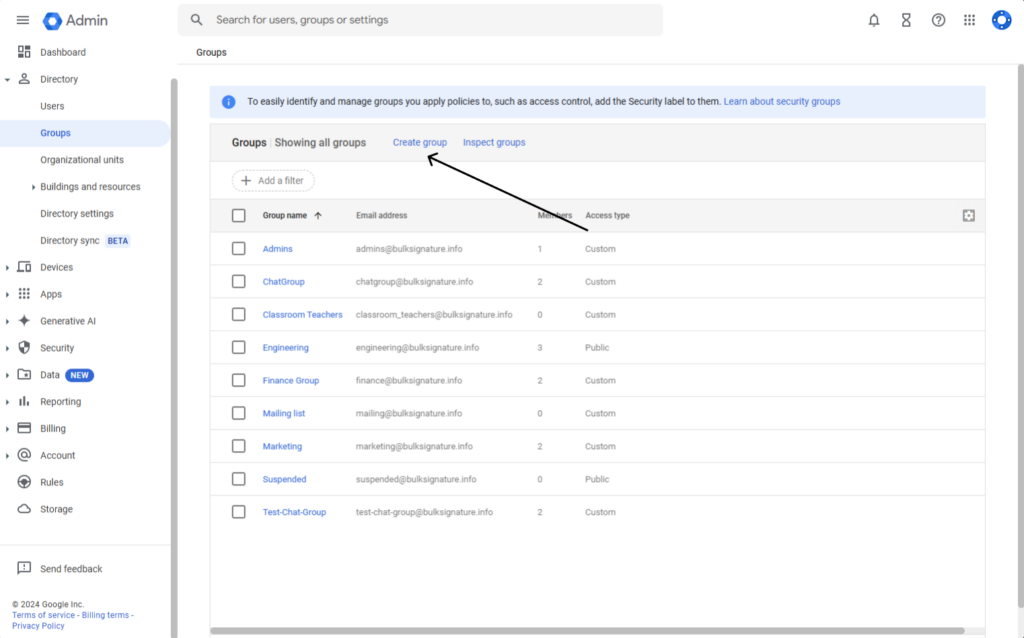
Login to your Google Admin console (admin.google.com)
Go to Directories > Groups > Create group
Add Group details and click Next
Change settings
Click Create group
Click Add members
Once you are set, click Done
Step 2. Access Gmail Settings: Go to Apps > Google Workspace > Gmail.
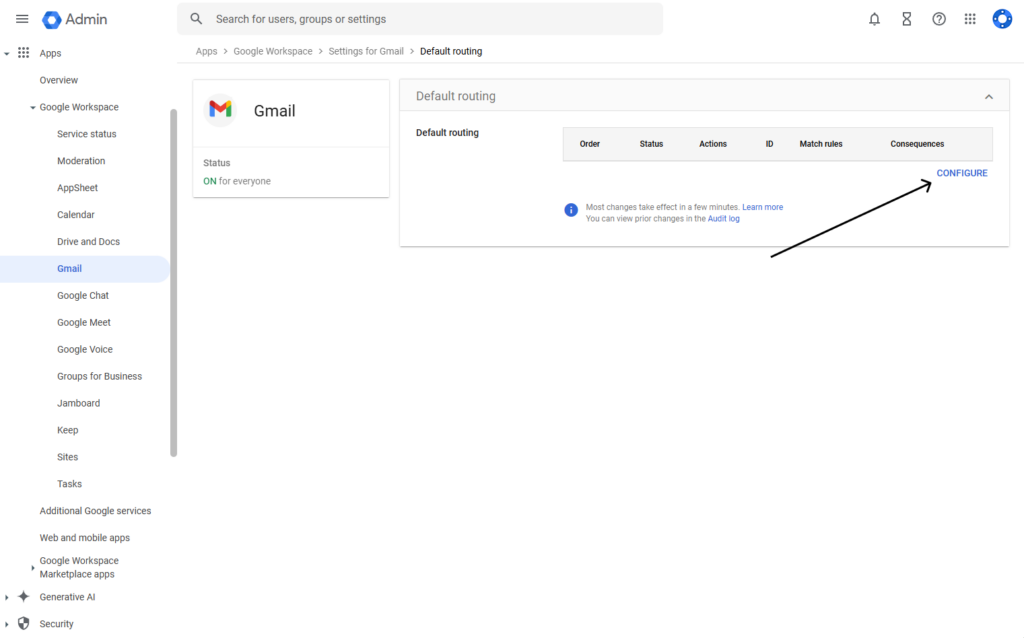
Step 3. Configure Default Routing: Select Default routing and click either Configure or Add another rule.
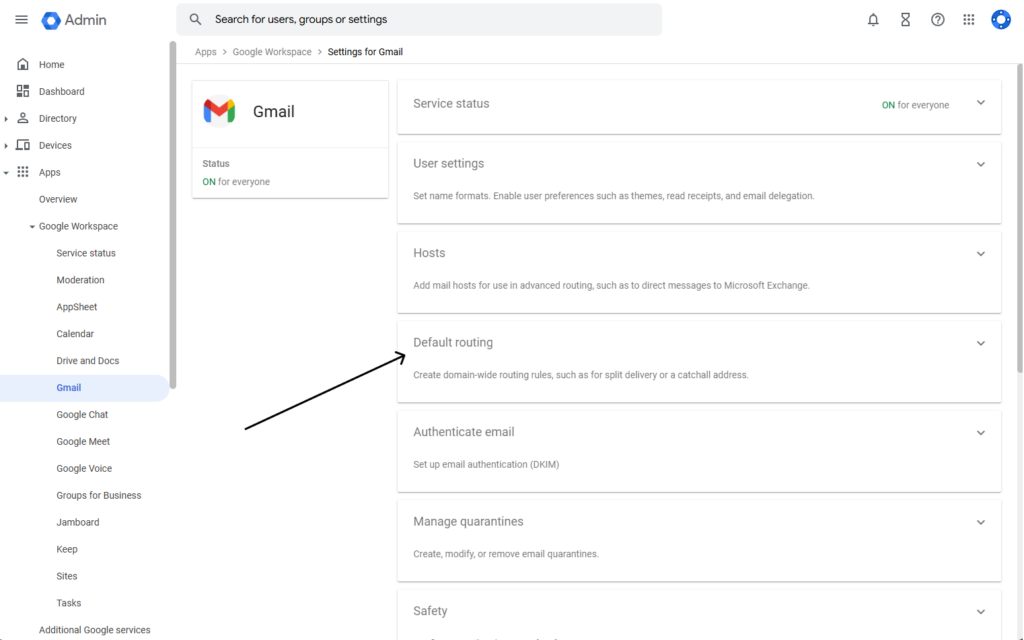
Step 4. Set Up the Rule:
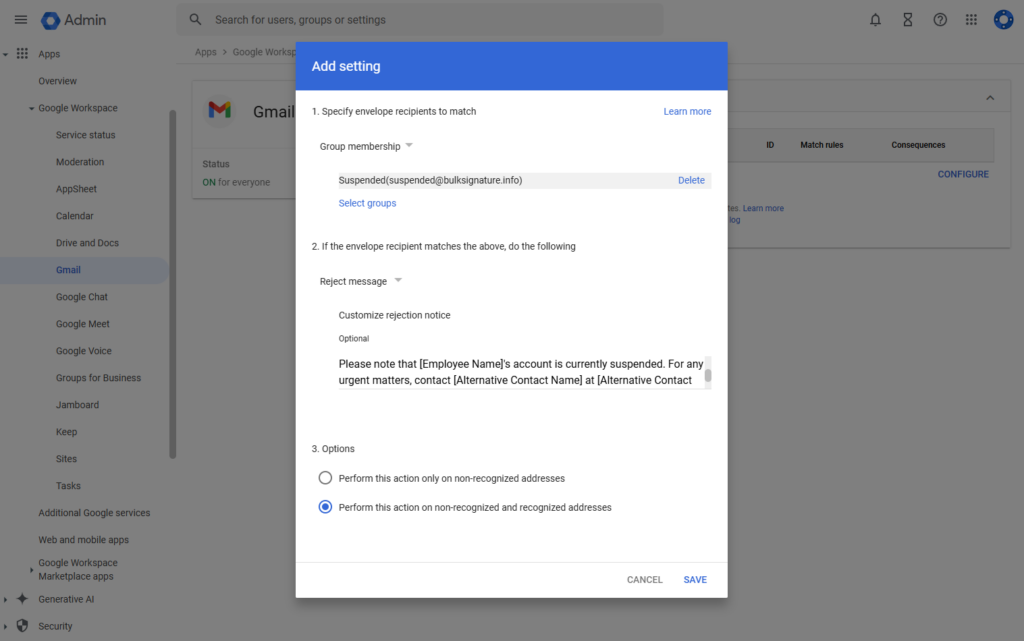
In the first section, select Group membership and enter the email address of the group you created.
In the second section, select Reject message and enter your custom rejection notice.
In the last section, select the option that says Perform this action on non-recognized and recognized addresses.
Step 5. Save the Rule: Click Save to apply the rule.
Email Templates for Departing Users Auto Replies
Selecting the appropriate auto-reply template for suspended users is crucial for maintaining effective communication and professionalism. The right template ensures that the message aligns with the tone and context of your organization, providing clear and helpful information to the sender. Below, we explain the use cases for different templates for your auto replies to help you choose the one that best fits your needs.
Example 1
Subject: Account Suspended – [Employee Name]
Hello,
Please note that [Employee Name]’s account is currently suspended. For any urgent matters, contact [Alternative Contact Name] at [Alternative Contact Email]. We appreciate your understanding.
Best regards,
[Company Name]
This template is suitable for a straightforward and professional notification. It clearly states the account suspension and provides an alternative contact for urgent matters, making it ideal for general business communications.
Example 2
Subject: Out of Office – [Employee Name]
Thank you for reaching out. [Employee Name] is currently unavailable. For immediate assistance, please reach out to [Alternative Contact Name] at [Alternative Contact Email]. Thank you for your cooperation.
Sincerely,
[Company Name]
This template is useful for a more casual and friendly tone. It’s appropriate for situations where the communication style is less formal, such as internal communications or with long-term clients who are familiar with the employee.
Example 3
Subject: Notice of Account Suspension – [Employee Name]
Dear Sender,
This is an automated response to inform you that [Employee Name]’s account has been suspended. For further assistance, please contact [Alternative Contact Name] at [Alternative Contact Email]. We apologize for any inconvenience.
Regards,
[Company Name]
This template is ideal for formal notifications. It’s suitable for official communications where a clear and respectful tone is necessary, such as with external partners or clients.
Example 4
Subject: Account Unavailable – [Employee Name]
Hello,
[Employee Name]’s email account is currently suspended and cannot receive messages. For urgent inquiries, please contact [Alternative Contact Name] at [Alternative Contact Email]. Thank you for your understanding.
Best,
[Company Name]
This template is best for concise and direct communication. It’s useful when you need to quickly inform the sender about the account status and provide an alternative contact, making it suitable for high-volume email environments.
Best Practices for Email Communication
Implementing auto replies for departing or suspended employees is more than just a technical task; it’s an opportunity to maintain professionalism and ensure smooth communication. Here are some best practices to consider apart from that:
Be Mindful of Attachments
Ensure that any attachments are relevant and necessary. Mention the attachments in the body of the email and use descriptive file names. Compress large files or use cloud storage links to avoid overwhelming the recipient’s inbox.
Use CC and BCC Appropriately
Use a Professional Email Signature
An email signature provides important contact information and reinforces your professional image. Include your full name, job title, company name, and contact details. You can also add links to your social media profiles or company website.
Use Email Filters and Labels
Set up rules for emails to automatically sort incoming emails based on criteria such as sender, subject, or keywords. This helps keep your inbox organized and ensures important emails are not missed. Use labels to categorize emails. Labels can be color-coded and applied to multiple emails, making it easier to find and manage related messages.
Use Encryption
When sending sensitive information, use email encryption to protect the content from being intercepted by unauthorized parties. Google Workspace offers built-in encryption options for secure email communication.
Conclusion
Setting up auto replies for departing or suspended employees in Google Workspace is a crucial step in maintaining seamless communication and professionalism. By following the steps outlined in this guide, you can ensure that important messages are redirected appropriately, and contacts are informed about the changes. Whether you’re managing temporary suspensions or permanent departures, choosing the right auto-reply template helps convey the necessary information clearly and effectively.

