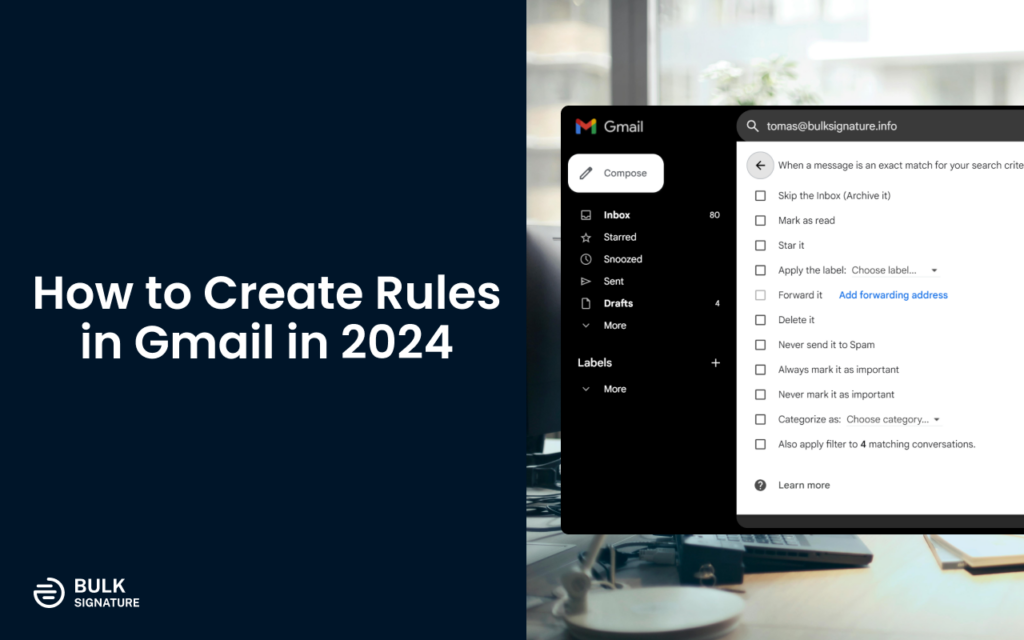
Feeling overwhelmed by a cluttered Gmail inbox? Do you spend more time sifting through emails than actually reading them? If so, you’re not alone. Millions of users struggle with email overload, but there’s a powerful solution that lies in creating rules in Gmail.
Contents
What are Gmail Rules?
Gmail rules, also known as filters, are like personal assistants for your inbox. They allow you to automatically filter your emails based on specific criteria, saving you time and keeping your inbox organized. With Gmail rules, you can:
Sort Gmail by sender: Automatically move emails from specific senders (like work colleagues or social media notifications) to designated folders.
Automatically label emails: Assign labels to emails based on keywords in the subject line or sender address, making them easier to find later.
Move emails to folders in Gmail: Move important emails from specific senders or with specific keywords directly to designated folders for easy access.
Filter unread emails in Gmail: Focus on new emails by filtering out already read messages.
Why You Need to Create Gmail Rules
There are many reasons why you need to learn how to create rules in Gmail. The essential ones are enlisted below:
Increased Productivity: By automating email organization, you can spend less time managing your inbox and more time focusing on what matters.
Improved Organization: Gmail rules help keep your inbox clutter-free, making it easier to find the emails you need quickly.
Reduced Stress: A clean and organized inbox can significantly reduce email-related stress and anxiety.
Peace of Mind: Knowing essential emails are automatically routed to the right folders ensures you never miss something crucial.
How to Create Rules in Gmail Using the Search Bar
The search bar in Gmail offers a powerful way to create custom rules/filters. Here’s a step-by-step guide:
Open Gmail and log in to your account.
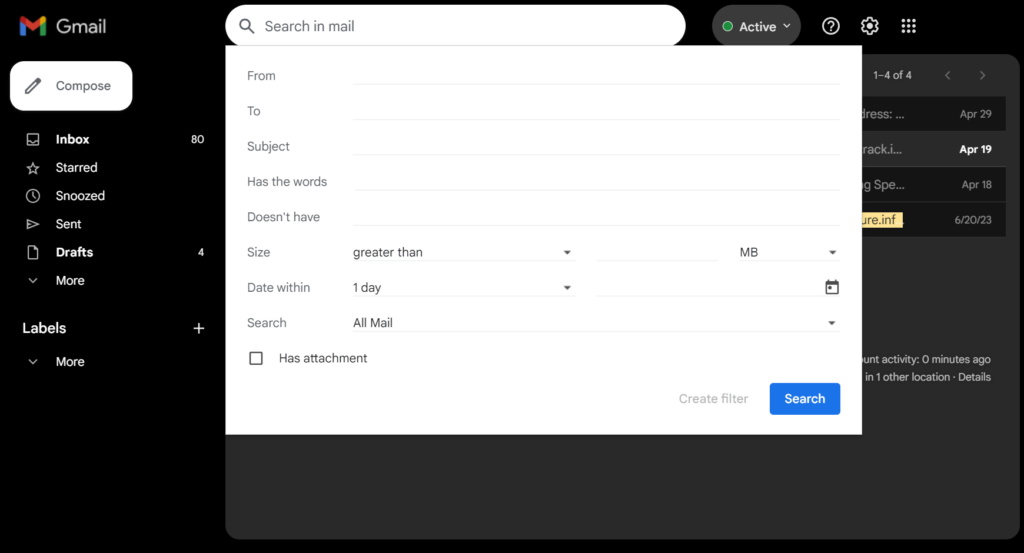
In the search bar at the top of the page, enter your search criteria. This could be a specific sender’s email address, keywords in the subject line, recipients, or any other relevant information.
For more complex searches, click the Show search options button located to the right of the search bar. This allows you to refine your search with additional criteria like attachment presence, specific dates, or even custom criteria based on message body content.
Once you’re satisfied with your search, in the same window that shows the search option, click the Create filter button next to the search button in the bottom right.
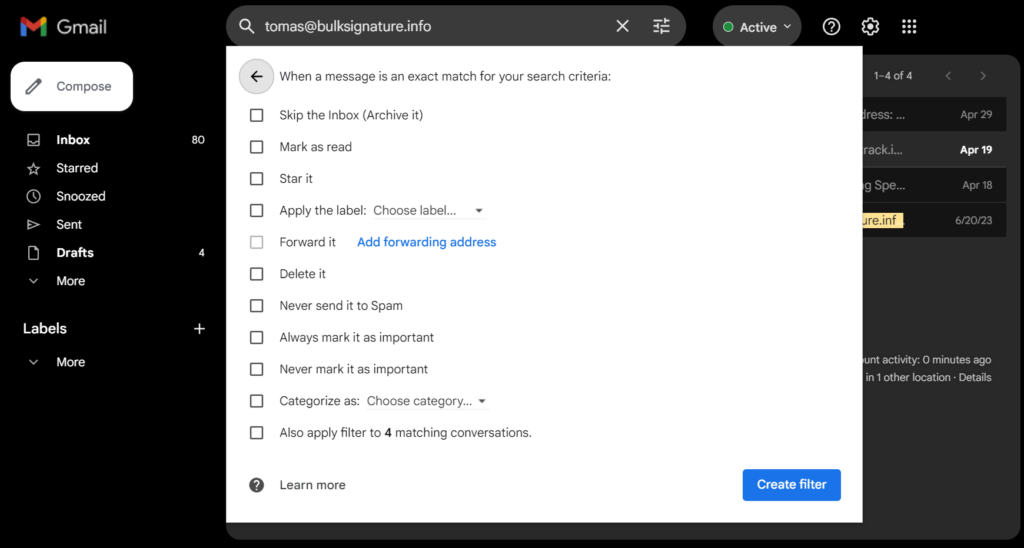
A new window will appear displaying the emails matching your search criteria. Here, you can choose what action you want Gmail to take for emails that meet this criteria.
Select the desired action(s) from the available options. These include:
Skip the inbox (Archive it): This removes the email from your inbox but keeps it accessible.
Mark as read: Automatically mark emails as read, saving you time.
Star it: Highlight important emails with a star for easy reference.
Apply a label: Assign a specific label to the emails for easy categorization.
Forward it to someone: Automatically forward emails to another address.
Delete it: This is a permanent action, so use it with caution.
Never send it to Spam: Ensure important emails aren’t mistakenly marked as spam.
Once you’ve chosen your desired actions, click Create filter to activate the rule.
How to Create Rules in Gmail Using a Specific Message
Another convenient way to create a rule is by using an existing email. Here’s how:
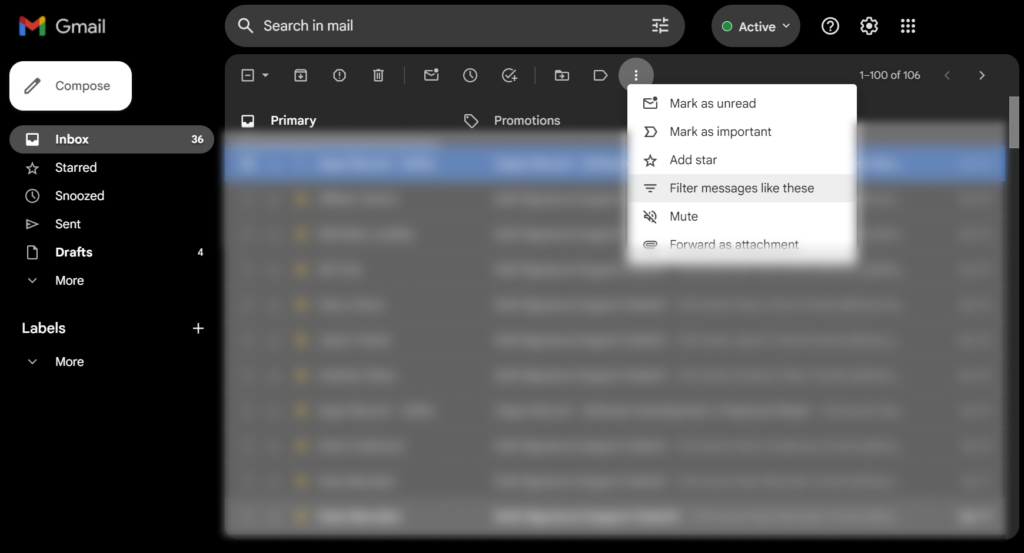
Open Gmail and locate the email you want to use as the basis for a rule.
Click the checkbox next to the email.
Click the three vertical dots (More options) menu located at the top of the inbox view.
Select Filter messages like these.
Gmail will populate the search criteria based on the selected email. You can further refine the criteria if needed, for example, by excluding specific keywords or adding additional senders.
Follow steps 6 and 7 from the previous section to choose your desired actions and activate the rule.
How to Create Gmail Rules to Move Emails to a Specific Folder
If you want to automatically move emails to a designated folder, here’s what to do:
Follow the steps in either “How to Create Rules in Gmail Using the Search Bar” or “How to Create Rules in Gmail Using a Specific Message” outlined above. These steps will guide you through creating a search filter based on your desired criteria (e.g., sender email address, keywords in the subject line).
In the Create filter window, locate the Apply label section. This is where you’ll direct Gmail to move the emails.
Here you have two options:
Use an Existing Label: If you’ve already created a folder (label) in Gmail for this specific category of emails, select that label from the dropdown menu. This will automatically move matching emails to your chosen folder.
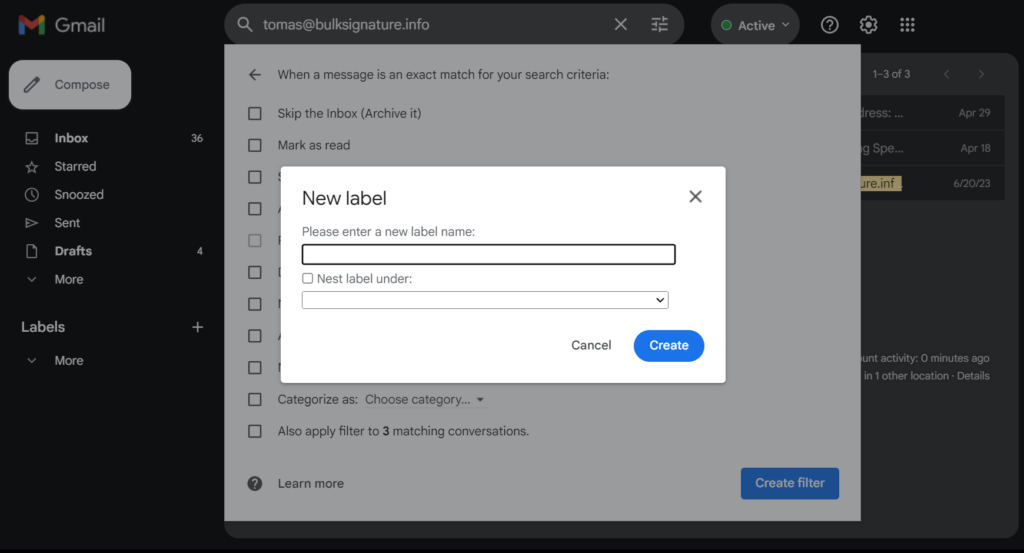
Create a New Label: If you haven’t created a specific folder yet, click Create new label next to the dropdown menu. A pop-up window will appear, allowing you to name your new folder (label). Once named, select the newly created label to associate it with the filter.
After selecting your desired label (existing or new), click Create filter to activate the rule. Now, all emails matching your search criteria will be automatically moved to the designated folder, keeping your inbox organized and important messages readily accessible.
Advanced Gmail Rule Tips and Tricks
Now that you’ve mastered the basics of creating Gmail rules, let’s explore some advanced techniques to further customize and optimize your inbox management:
Combine Multiple Criteria: Don’t limit yourself to a single search term. You can combine multiple criteria to create highly specific filters. For example, create a rule to move all emails from a specific sender with the word “urgent” in the subject line to a designated Urgent Matters folder.
Star Important Emails Automatically: Use the Star it action to automatically mark important emails from specific senders or with specific keywords in the subject line. This helps them stand out in your inbox and makes them easier to find later.
Filter Out Noise: Feeling overwhelmed by social media notifications or low-priority newsletters? Create rules to automatically archive or skip the inbox for emails from these sources. This keeps your inbox focused on more important messages.
Manage Large Email Volumes: If you receive a high volume of emails from a single sender (like a mailing list), consider creating a rule to automatically archive them while still allowing you to access them if needed.
Vacation Responder Integration: Combine Gmail rules with vacation responder functionality. Set up a rule to automatically send a pre-written response to incoming emails while you’re away, ensuring senders receive an acknowledgment.
Leverage Labels Effectively: Labels are powerful for categorizing emails beyond folders. Use rules to automatically assign labels based on specific criteria, making it easier to search and organize your inbox later.
Refine Existing Rules: Don’t be afraid to revisit and adjust your Gmail rules as your needs evolve. The Filters and Blocked Addresses settings allow you to edit or delete existing rules to ensure they continue to meet your requirements.
Search Within Labels: Once you’ve categorized emails with labels, you can leverage the search bar to search specifically within those labeled groups. This helps you quickly find emails within a specific category.
By implementing these advanced tips and tricks, you can transform your Gmail rules into a powerful tool for inbox automation and organization. Remember, a well-organized inbox leads to increased productivity, reduced stress, and a newfound sense of control over your email flow.
Conclusion
The age of battling a cluttered inbox is over. By leveraging the power of Gmail rules, you can reclaim control of your email and transform it into a well-oiled machine.
Take some time to experiment with different rule combinations and explore the advanced techniques outlined above. Remember, the key is to customize your rules to fit your specific needs and preferences.
There is always a huge range of things you can do to maximize your email communication. One thing that is often overlooked—apart from rules and filters in Gmail—is email signatures. BulkSiganture is a flexible solution for your company-wide email signature management that is fully integrated with your Google Workpsace.
With a little effort, you’ll be amazed at how much time and frustration you can save by automating your inbox management. So, go forth and conquer your email chaos – one Gmail rule at a time!