
Home > Google Workspace Handbook > User Management > How to Merge Domains in Google Workspace
Smartphones, laptops, tablets, and other possible devices have become huge part of our life in and out of the office. As the efficiency grows, so do the responsibilities of IT departments. That is caused by the requirement to manage organizational assets including keeping corporate data secure.
If your organization uses Google Workspace the key solution to the problem is to set up proper device management. Google Admin console provides you with comprehensive device management. In the article you’ll learn the key aspects of the Devices section of your Google Admin console.
The primary reason why you need to manage user devices is Security. By managing user devices, administrators can enforce security policies, such as requiring strong passwords, enabling device encryption, and checking for potentially harmful apps. This helps protect sensitive data and ensures that only authorized individuals can access company resources.
Another key advantage of user device management is Data protection. Managing user devices allows administrators to remotely wipe devices in case of loss or theft, preventing unauthorized access to sensitive information. It also enables them to back up and restore data on devices, protecting against data loss.
What’s more is that proper user management assists Productivity and collaboration in a proper manner. By managing user devices, administrators can deploy and configure productivity tools and collaboration software, such as email clients, document editors, and video conferencing apps. This ensures that employees have the necessary tools to work efficiently and effectively.
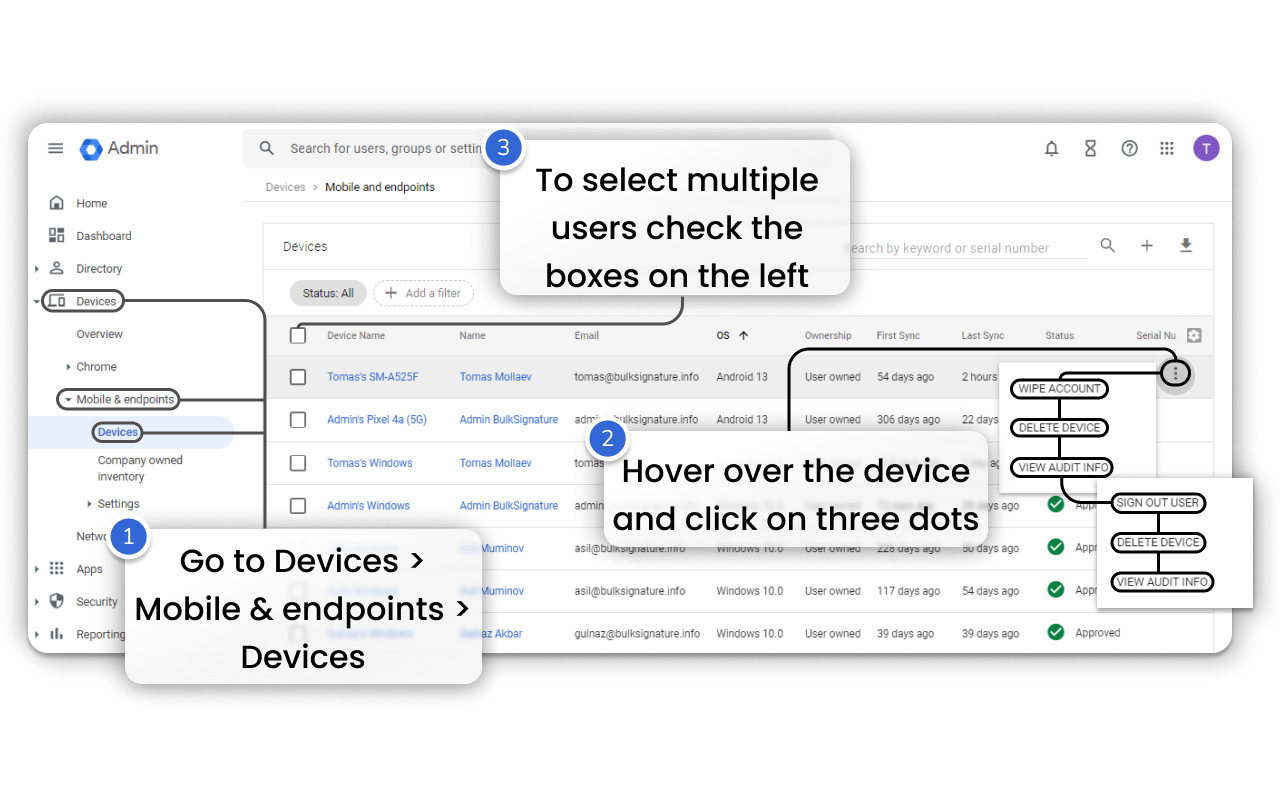
Google Admin console allows you to see what devices users employ, the actual OS version, first and last sync date. Among the key mobile device management functionalities are the ability to Wipe Account, Delete Device, View Audit Info. The console also allows you to review each device’s security, including Encryption status, Verified apps, OS security patch, Potential harmful apps presence. To access mobile devices management settings you need to follow the steps:
In the opened menu you can see the list of mobile devices of your organization. From this page, you can do the following set of actions:
The process of endpoints management in Google Admin console is barely different from mobile devices management. To access the list of endpoints you need to:
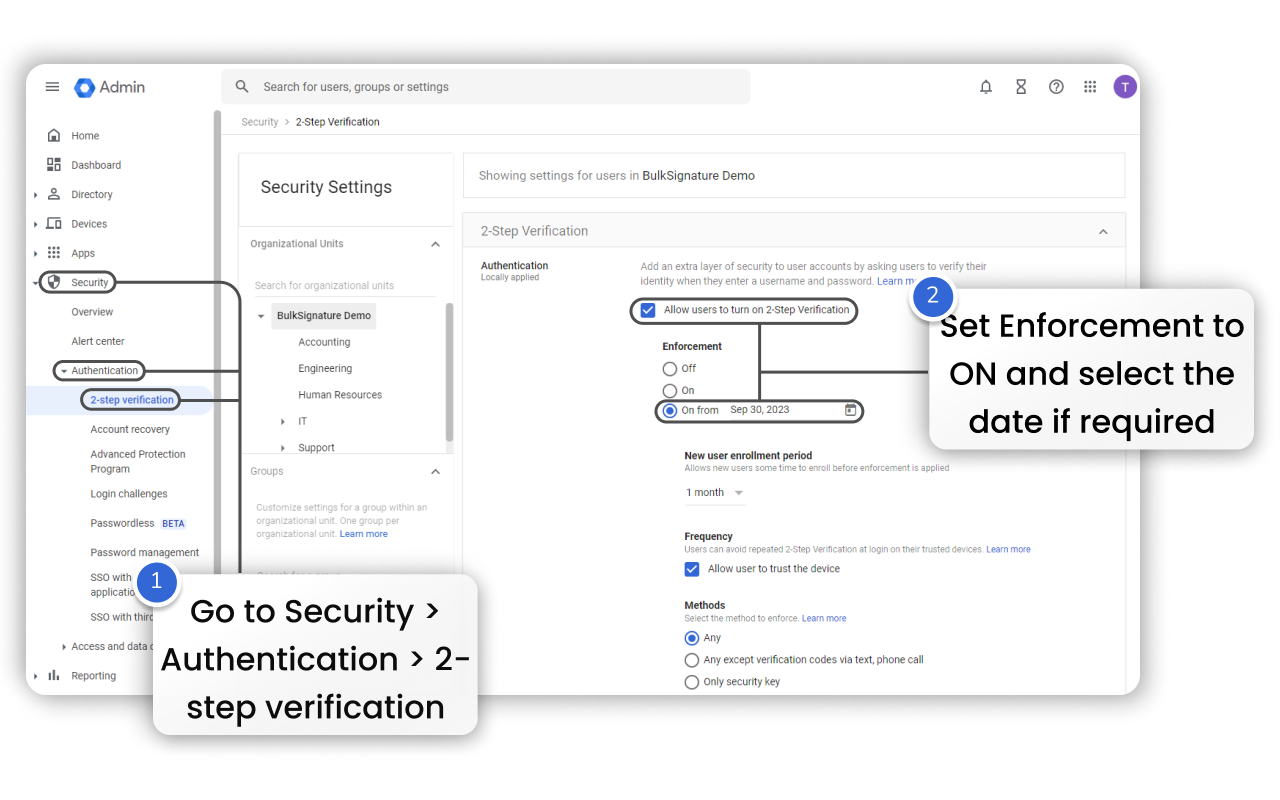
Two-Step Verification is a commonly used measure for securing accounts. You can set up this measure in Google Workspace. To do that you need to have super admin privileges. Follow the steps to enable it:
Google Admin console also allows you to set different settings for selected Organizational units. To do that select OUs in the left panel that you’d like to apply the changes to.
When it comes to mobile devices and endpoints management, you also have the option to tweak data access. It includes:
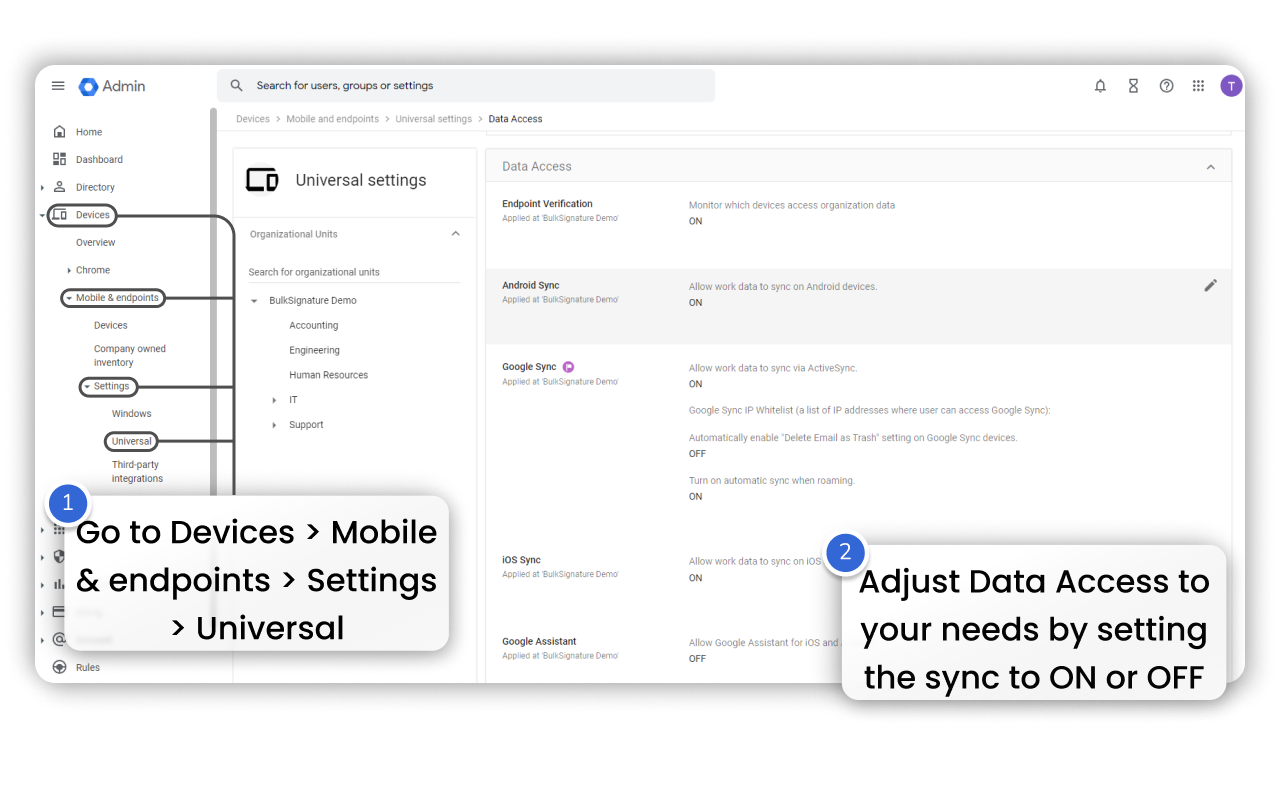
To access this set of changes you need to:
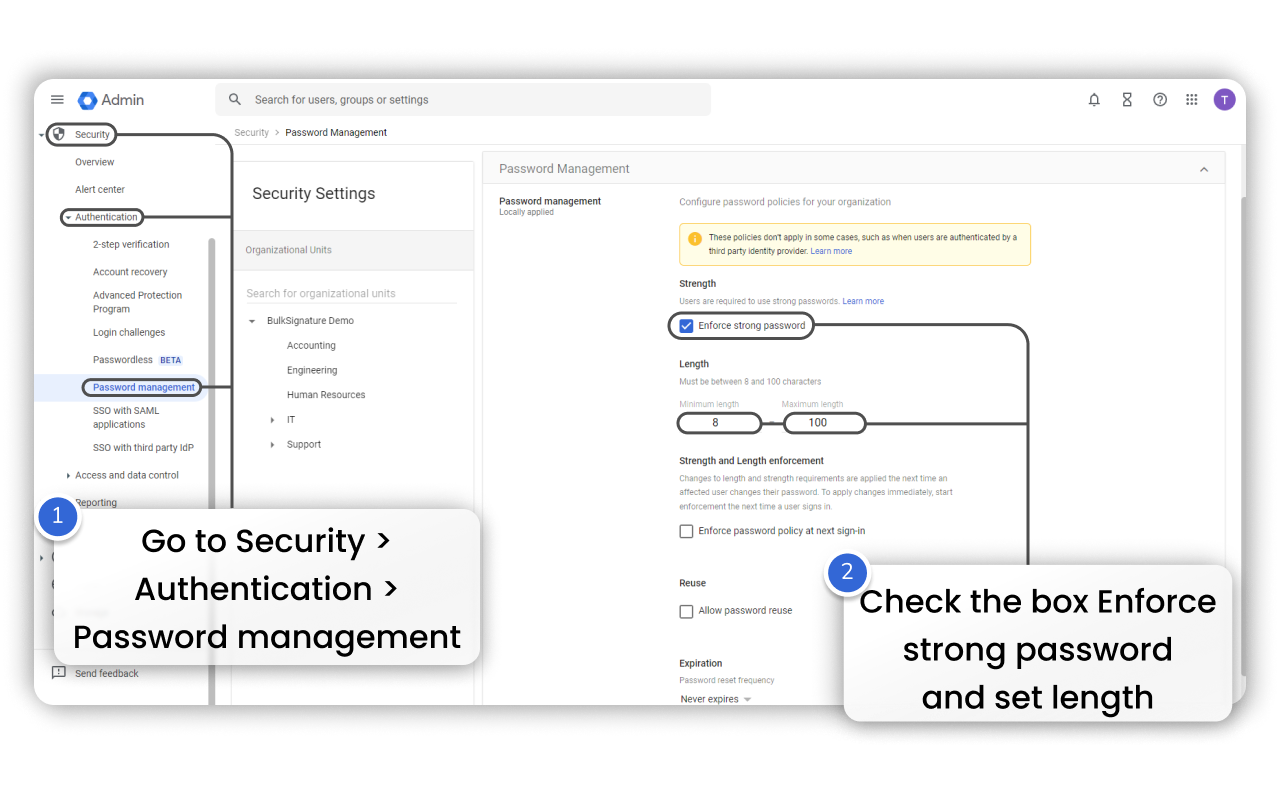
Forcing strong passwords is another commonly used measure for enhanced security. When enabled it requires users to reset their password on a regular basis. To turn it on follow the steps:

Explore Our Latest Blog Posts
Try Your New Email Signature Management Software
BulkSignature allows you to create and manage company-wide email signatures.

