Home > Google Workspace Handbook > Email Signatures > How to Install HTML Email Signature to Apple Mail
In Apple Mail, go to the top menu bar and click Settings. Navigate to Signatures tab.
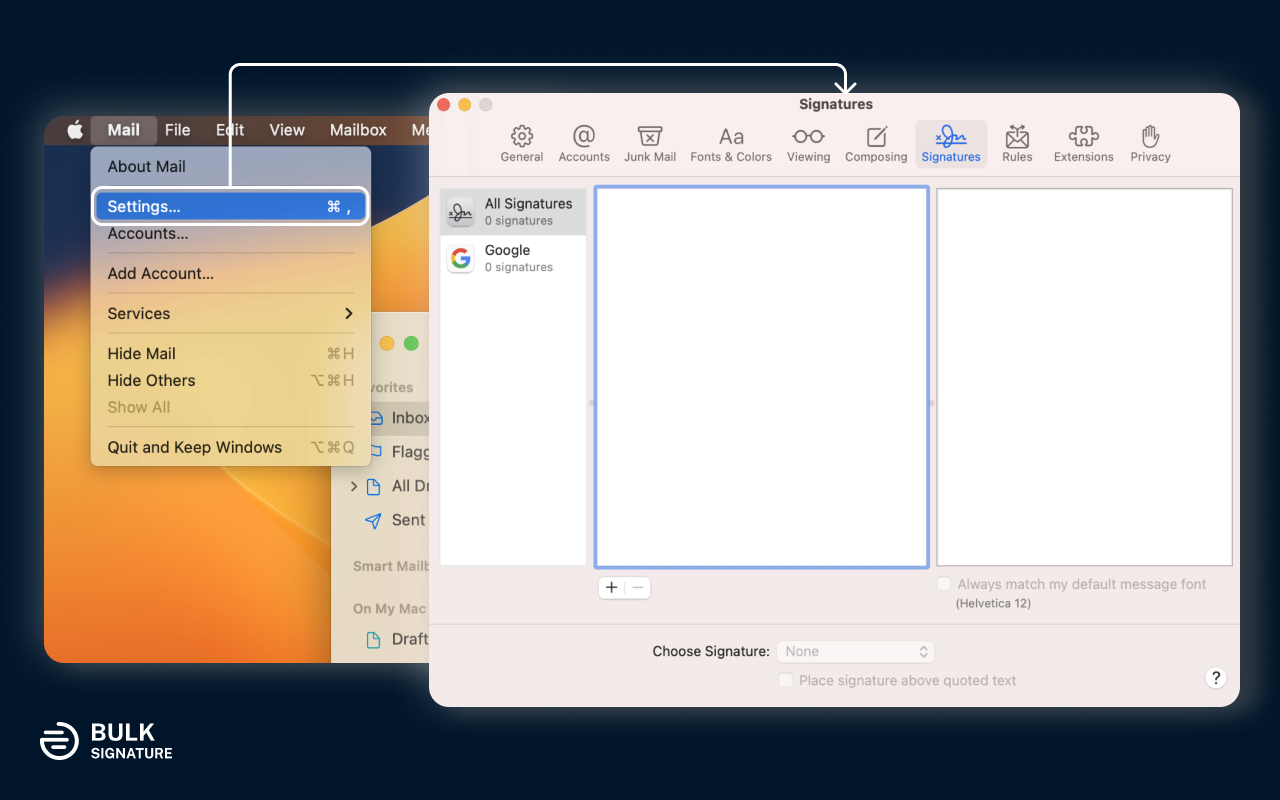
Click the + button and create a new signature. Name the signature as test, and put any text which you can identify later.
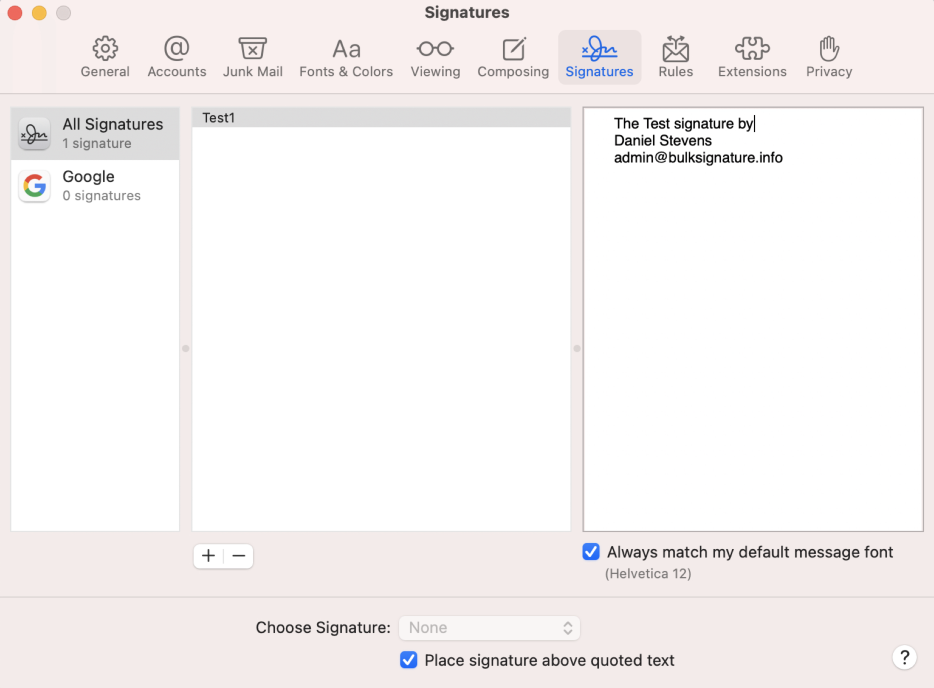
This text should be recognizable to you as we will use it to help identify the correct signature system file later. If you want to set the signature to be the default for an email account with auto-load when starting a new message, select the email account in the first column, and choose the new signature. Close the Preferences window to save it, then quit Apple Mail.
Go > Go to Folder...
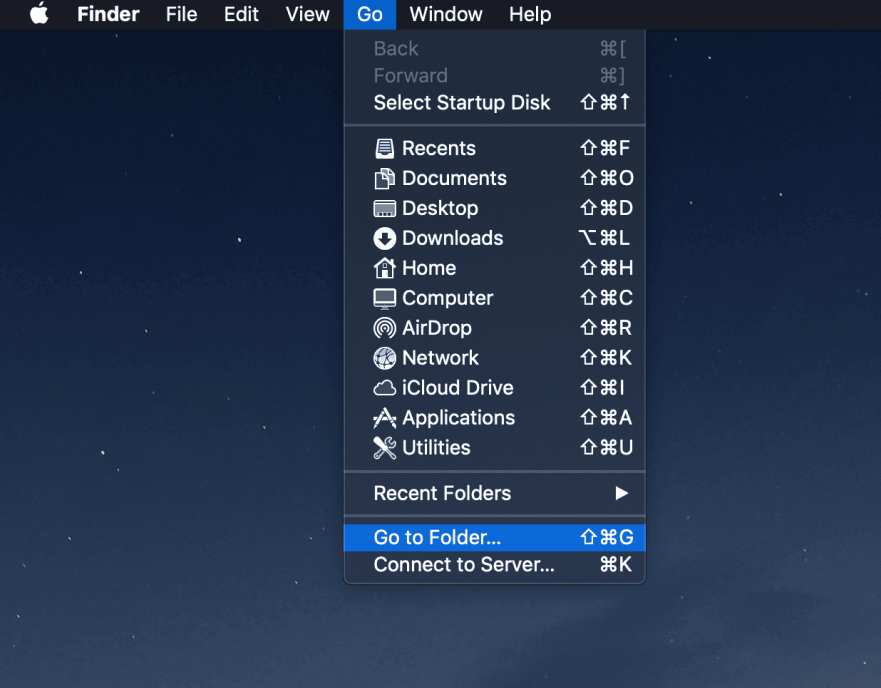
2. A panel will popup that allows you to input the direct path to the signature folder. Copy/paste the following line into the box:
~/Library/Mail/ and click go button
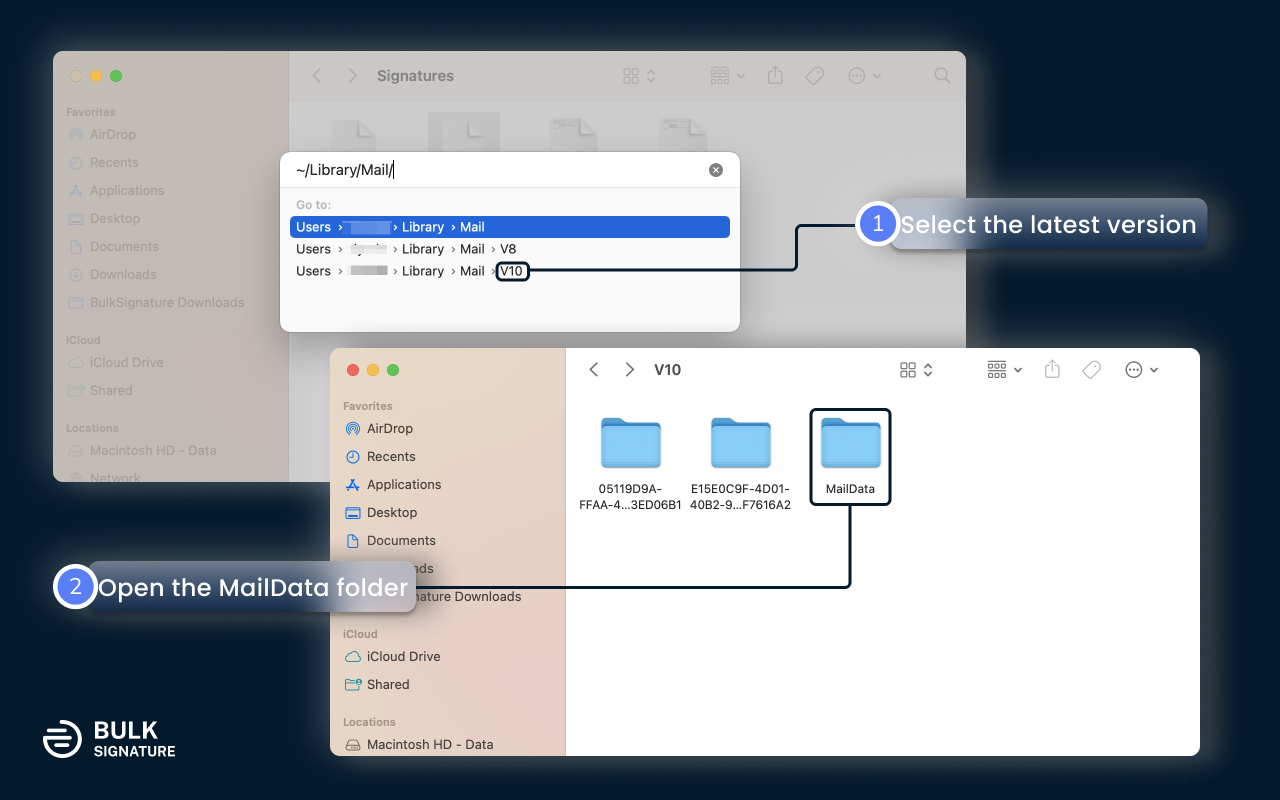
3. Select the folder that starts with V and latest number. For example, V10 and then navigate to MailData folder. Find signatures folder and click go
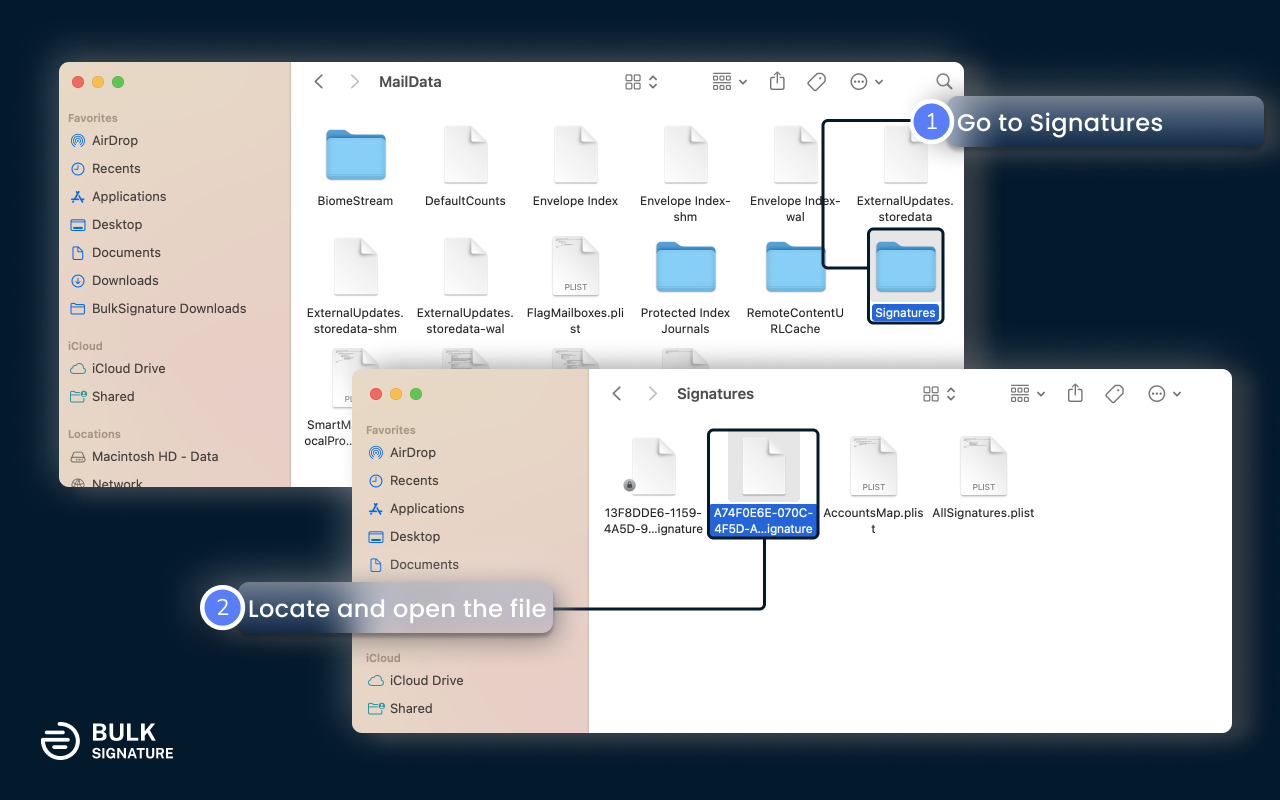
4. Once you open the signatures folder, a finder window should appear with several files. Look at the file names and notice the ones that end in .mailsignature. These are the files we are interested in working with. More specifically, we are looking for the placeholder signature file you created earlier.
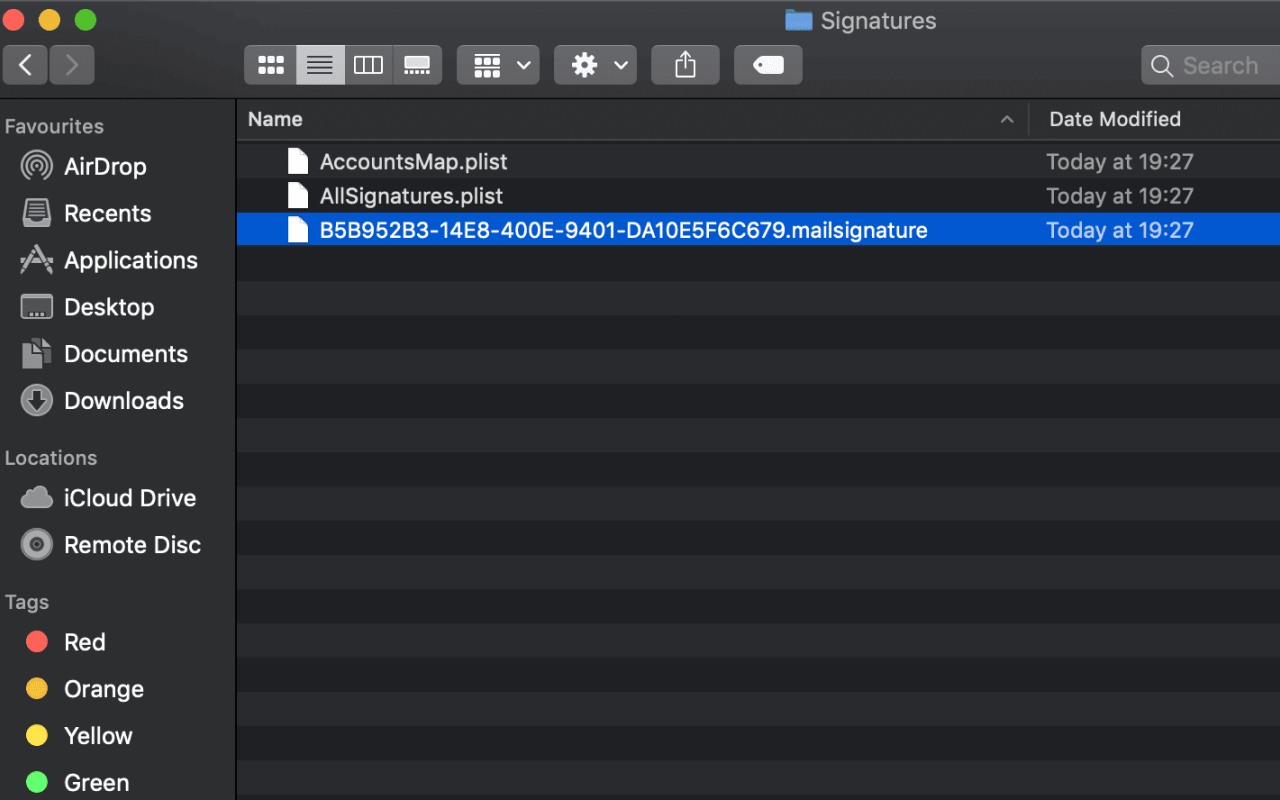
5. Locate the most recently modified .mailsignature file. If you have more than one signature file in there, or cannot determine which is the placeholder, you can open each of them to help you find the right file. Simply repeat the following process for all the files. Right-click on the .mailsignature file in Finder, select Open With, and choose TextEdit. If TextEdit is not an option, choose Other…, and then choose Applications > TextEdit
Now that you have the .mailsignature file(s) open in TextEdit, we need to ensure it is the right one. Make sure that the placeholder file we created earlier is open by scanning each of the open TextEdit documents for the placeholder text you entered earlier in the Mail.app preferences panel.
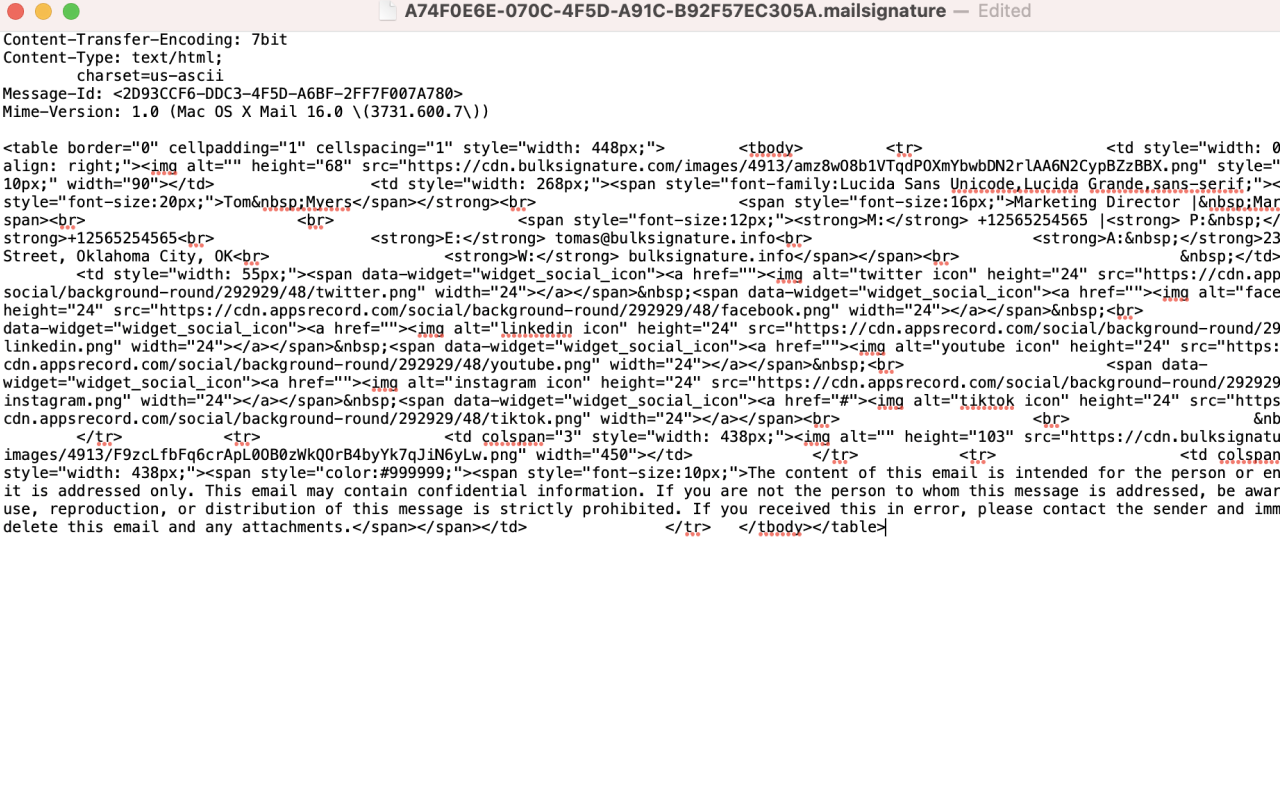
When you have located the right placeholder .mailsignature file, keep it open and close all other TextEdit windows. Feel free to resize the window to make text editing a bit easier. You will see a few metadata lines on the top of the file and some HTML code below it. Select all that code from the line starting with body, all the way to the end of the file.
Keep the top metadata lines, delete the entire block of placeholder HTML code.
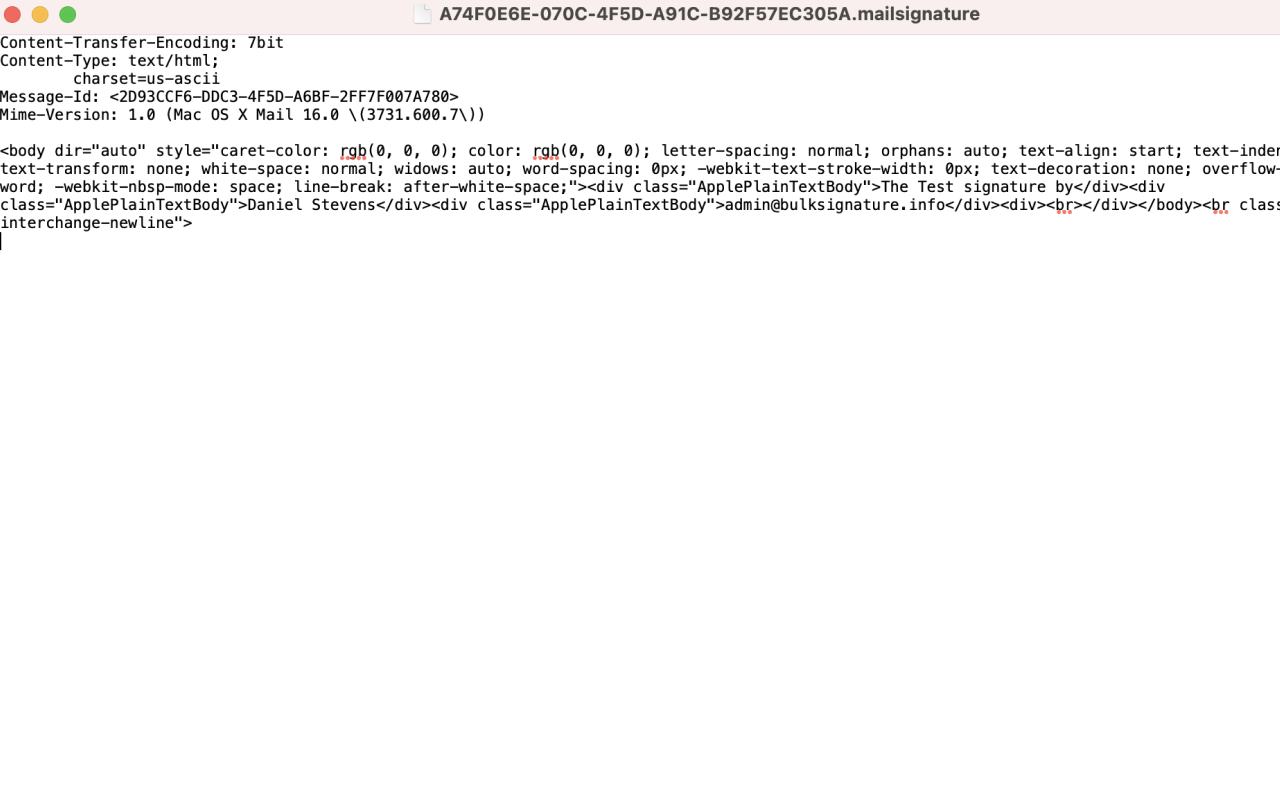
6. Still keeping the top metadata lines, paste in your own custom HTML code you obtained from BulkSignature.
7. Save and close the file, then Quit TextEdit.

BulkSignature allows you to create and manage company-wide email signatures.