In today’s fast-paced world, managing multiple email accounts can feel overwhelming, especially when it comes to Gmail in Outlook. For those accustomed to the familiarity of Gmail, transitioning to Microsoft Outlook for work or personal use can be daunting. But fear not! Here’s a comprehensive guide on configuring Gmail within Outlook, allowing you to leverage the power of both platforms.
Why Use Gmail in Outlook?
There are several compelling reasons to integrate Gmail with Outlook:
Centralized Control: Consolidate your emails into a single platform, streamlining your workflow and eliminating the need to switch between applications.
Leveraging Outlook’s Features: Take advantage of Outlook’s robust organization tools like categories, flags, and powerful search functions to manage your Gmail effectively.
Offline Access: Outlook allows you to access and manage your Gmail even without an internet connection, ensuring uninterrupted productivity.
Before We Begin: Enabling IMAP in Gmail
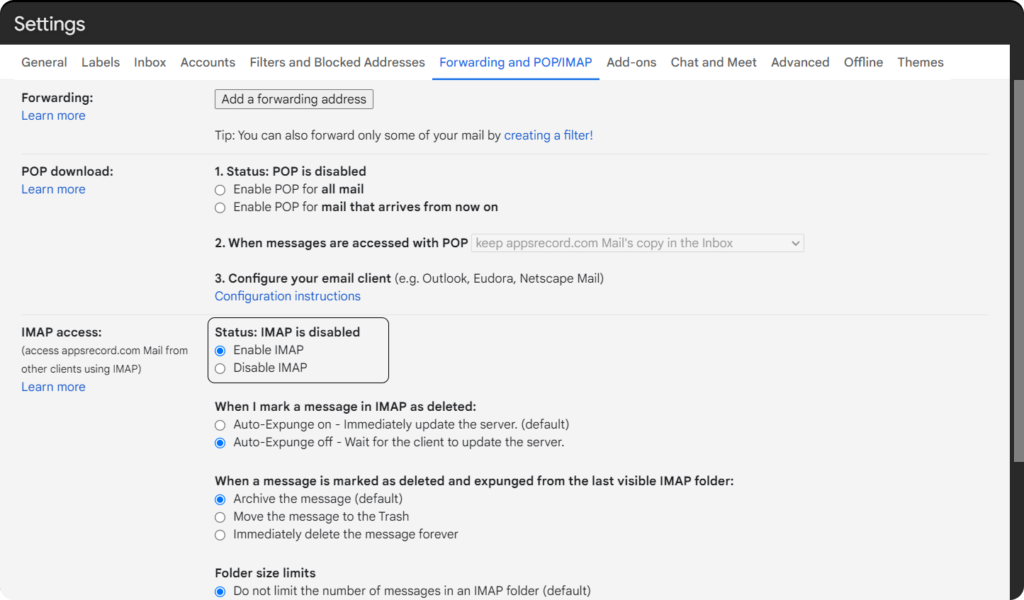
For seamless integration, Gmail requires enabling IMAP (Internet Message Access Protocol). IMAP allows Outlook to access and manage your Gmail messages directly. Here’s how to activate it:
Sign in to your Gmail account.
Click the Settings gear icon in the top right corner.
Select “See all settings.”
Navigate to the “Forwarding and POP/IMAP” tab.
In the “IMAP Access” section, choose “Enable IMAP.”
Click “Save Changes” at the bottom of the page.
Additional Security Tip: For enhanced security, it’s highly recommended to enable two-factor authentication (2FA) on your Gmail account before connecting it to Outlook.
Setting Up Gmail in Outlook for PC and Mac
Now, let’s integrate your Gmail with the Outlook desktop application. Note that Microsoft has recently published an updated version of Outlook that significantly simplifies the process, and in the nearest future the updated version is going to replace the previous version of Outlook. Here is how you can log in to your Gmail account using Outlook:
Step 1. First, you need to get the updated version. For Windows users, you can get it in Microsoft store; for Mac users, you can install the app from Apple App Store.
Step 2. Launch Microsoft Outlook.
Step 3. Enter your Gmail address.
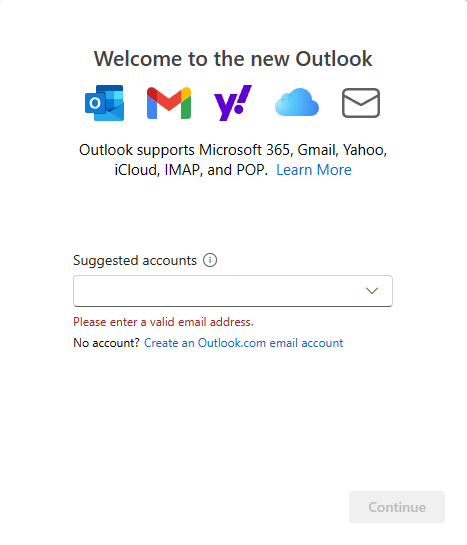
Step 4. You will be prompted for security verification via 2FA, follow the on-screen instructions provided by Google.
Step 5. Outlook will automatically detect the server settings. However, you might be prompted to enter your password again.
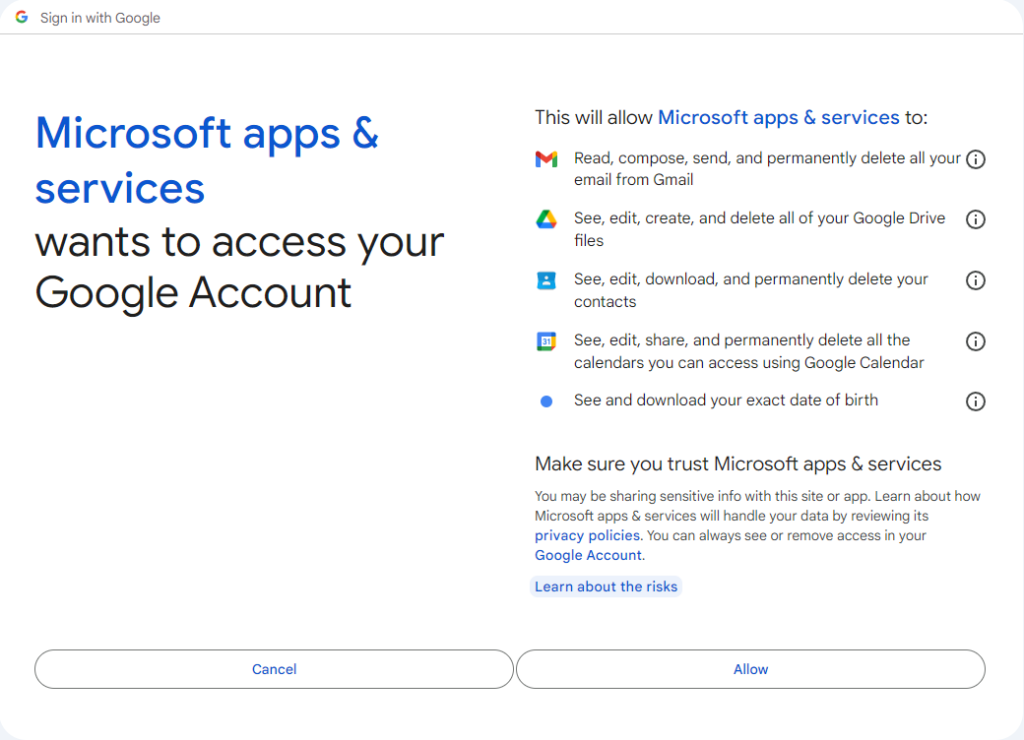
Step 6. Once authenticated, click Allow to grant Outlook access to your Gmail account.
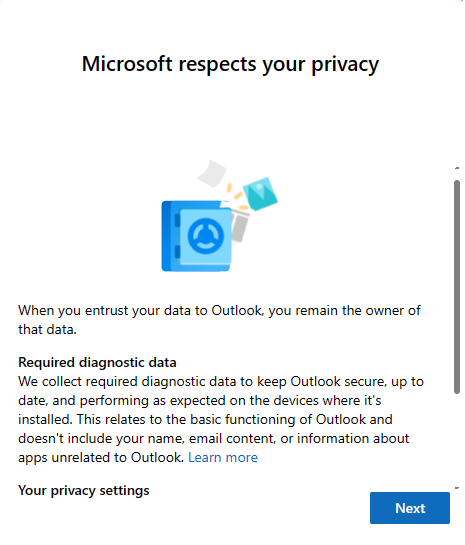
Step 7. Review the Required diagnostic data and click Next to proceed.
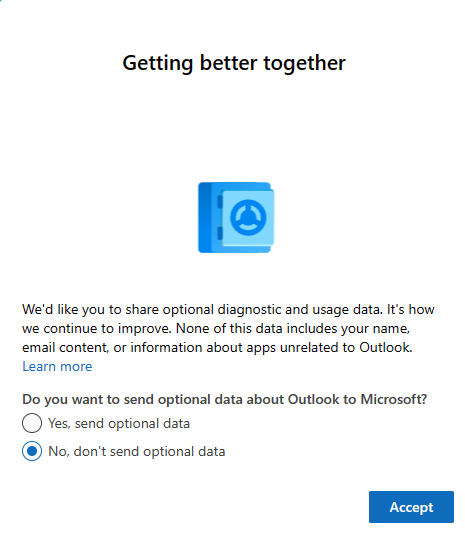
Step 8. On the next step, you can opt out from sending optional diagnostic data to Microsoft.
Step 9. In the following step, Microsoft will inform on collecting your service data. Do not worry, you will be able to customize it later in your settings.
Step 10. After that, Outlook will prepare your dashboard.
Step 11. Once your account is all set, you can disable the service data collecting. Navigate to Settings by clicking the ⚙️ icon > General > Privacy and data > Privacy settings > Make sure the toggles are disabled.
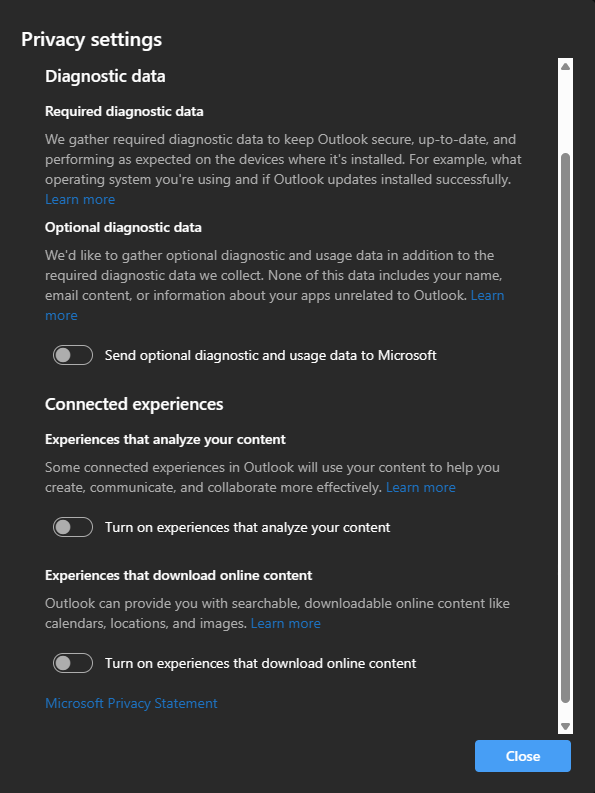
Step 12. Now, you are all set, and you can use your Gmail account in Outlook.
Optimizing Your Gmail Experience in Outlook
Now that you’ve successfully integrated Gmail with Outlook, here are some tips for a smooth user experience:
Manage Folders: Gmail labels translate to folders in Outlook. You can access them from the navigation pane on the left side of the Outlook window.
Search Functionality: Leverage Outlook’s advanced search capabilities to efficiently locate specific emails within your Gmail account.
Calendar Integration: If you use Google Calendar, consider syncing it with Outlook for a unified calendar view.
Additional Outlook optimization
The updated version of Outlook provides a huge range of additional optimization features that can drastically improve your experience. Let’s find out what it includes.
How to customize ribbon in Outlook (New) in 2024?
Some Outlook users may notice that in the updated version, the ribbon has significantly been changed. If you are looking for a way to return the original view of the ribbon, you can easily customize it by clicking View on the top menu > Layout > Ribbon > Set it to Classic ribbon. That’s it. Your original ribbon is back. However, there is also a quicker way to switch between the two ribbon forms, simply by clicking the down arrow icon on the menu.

How to change the font size (density) in Outlook?
Another thing that you can adjust in your Outlook allows you to customize how much text you want to see at once. By going to the View tab > Density > and choosing one of the given options, which are Cozy, Roomy, Compact, you can adjust the overall font size of the interface.
How to change theme in Outlook?
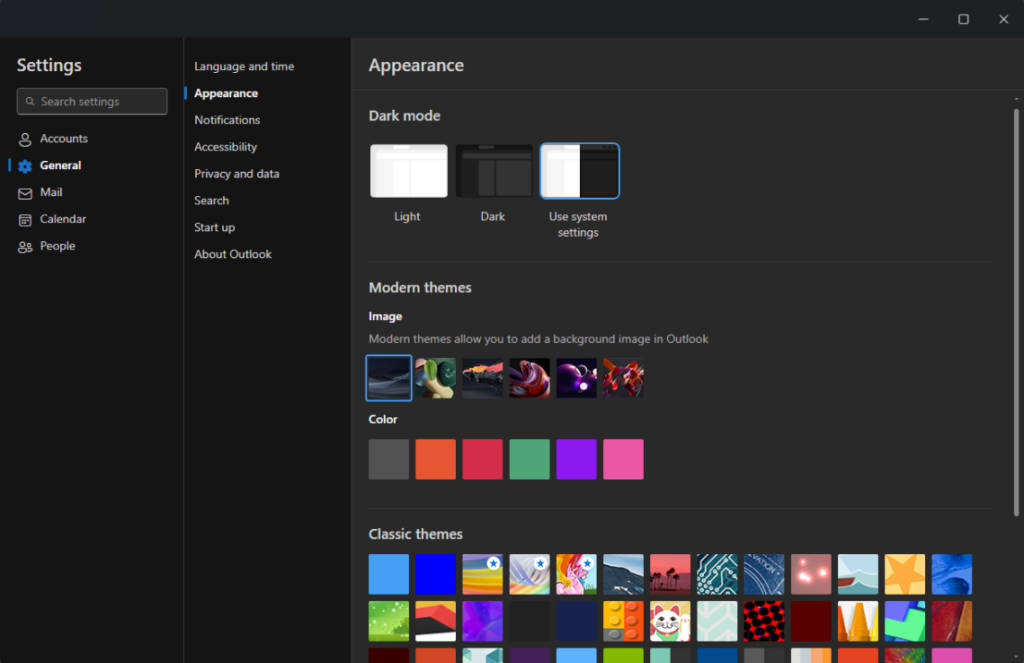
Outlook provides a huge range of themes that you can select to use. To change your theme navigate to your Settings by clicking the gear icon⚙️> General > Appearance.
How to create events from emails in Outlook?
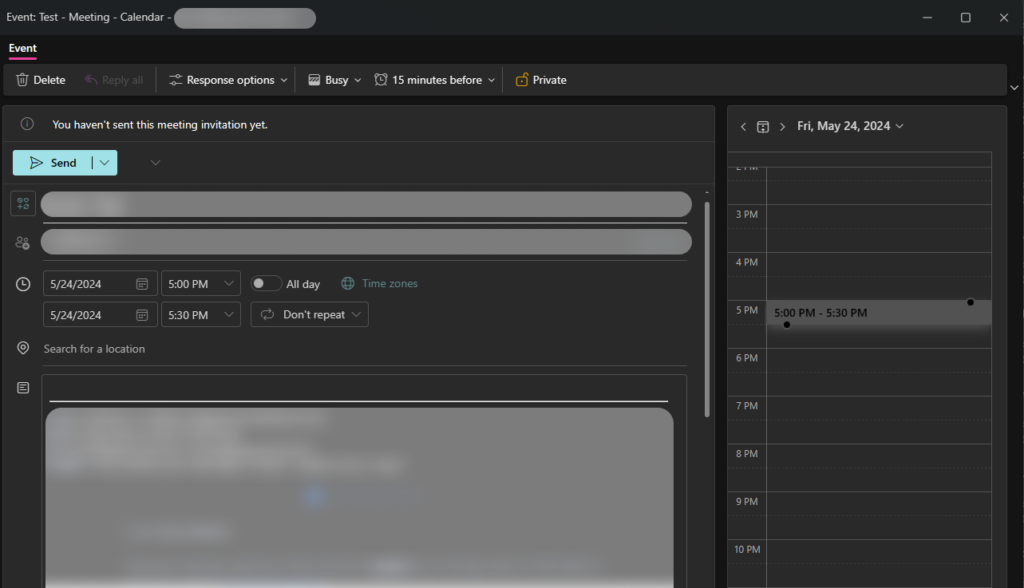
If you open your Calendar (hit the calendar icon in the top right corner), you can now drag and drop any email to your Calendar. You can then customize it to use it as an event.
How to snooze emails in Outlook?
It’s quite easy to get overwhelmed by your emails. For that, Outlook offers a neat feature that allows you to snooze emails. Snoozing emails will simply remove them from your inbox and bring them back to your attention at the selected point in time later. To snooze an email, simply need to open or select an email(s) and click the Snooze button. You will then be prompted with several date and time options on which you would like to get your emails back to your inbox.
Troubleshooting Common Issues
Authentication Errors: Double-check your Gmail password and ensure 2FA verification is successful.
Server Connectivity Issues: Verify a stable internet connection and consult support resources for either Outlook or Gmail if the issue persists.
Missing Folders: Restart Outlook. If labels are still missing, navigate to your Gmail settings and ensure “IMAP access” is enabled for all folders.
Login Issue: Make sure that IMAP is enabled in your Gmail account. Check your SMTP and other settings in your email client. If Outlook won’t accept your password, try using an app password instead of your regular password
By following these steps and helpful tips, you can effortlessly manage your Gmail account directly within the familiar interface of Microsoft Outlook. This integration empowers you to streamline your workflow, leverage the strengths of both platforms, and conquer your ever-growing inbox!
Managing Email Signatures Across Platforms
Maintaining consistent and professional email signatures across all platforms is crucial for branding and communication. However, managing separate signatures for Outlook and Gmail can be time-consuming.
This is where a solution like BulkSignature can be a game-changer. BulkSignature integrates with Google Workspace, allowing organizations to centrally manage email signatures for all users, including those who use Outlook.
Benefits of BulkSignature:
Centralized signature management for consistent branding across platforms (Outlook and Gmail).
Easy updates and rollouts of new signature templates.
Advanced features like dynamic content and legal disclaimers.
BulkSignature also offers a plugin for Outlook on Windows and Mac. This allows organizations to leverage the power of BulkSignature for centralized signature management even for Outlook users within the organization.
