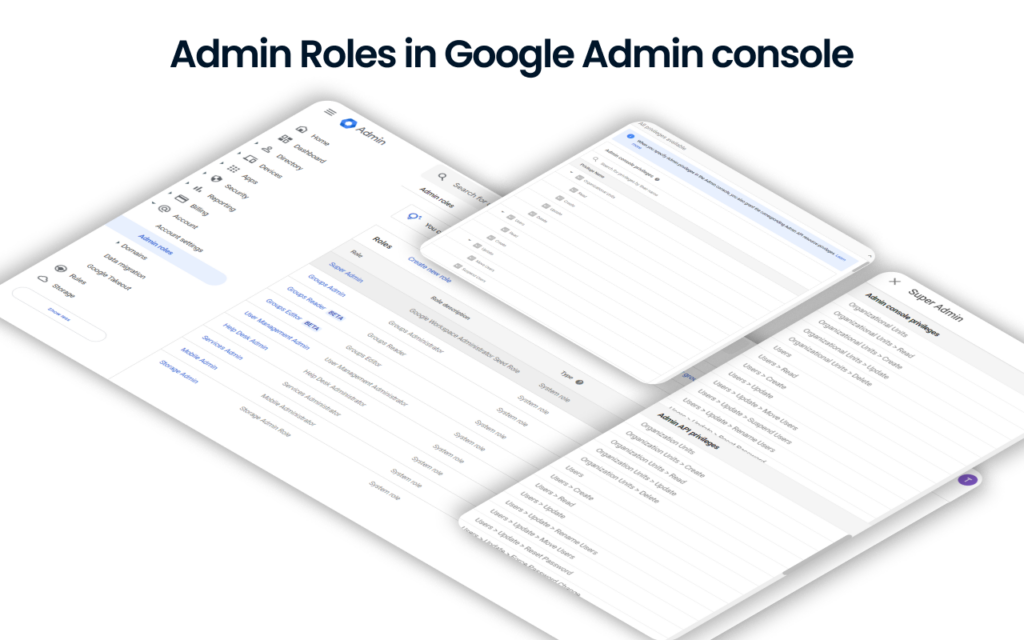
In Google Admin console you can find a set of pre-made roles that can be assigned to users in your organization. Each role has various permissions and privileges.
In this article, you’ll learn about what administrator roles are, the difference between the default roles, how to set them up and assign roles to your users, and how you can create a custom role in Google Admins console.
What is Google Admin console and how to access it?
The Google Admin Console is a centralized dashboard that allows administrators to manage Google Workspace services for their organization. It provides tools for managing users, devices, apps, security settings, and more, ensuring that your organization’s data and resources are secure and efficiently managed.
Key Features of Google Admin Console
- User Management: Add, remove, and manage user accounts and groups.
- Device Management: Monitor and secure devices that access your organization’s data.
- App Management: Control which apps and services are available to users.
- Security Settings: Configure security policies to protect your organization’s data.
- Reporting and Insights: Access detailed reports on user activity and system usage.
How to Access Google Admin Console
Sign In:
- Open your web browser and go to admin.google.com.
- Enter the email address and password for your admin account. Note that this account does not end in @gmail.com but is associated with your organization’s domain.
Navigate the Dashboard:
- Once signed in, you will see the Admin Console dashboard. This dashboard provides access to various management tools and settings.
- Use the main menu on the left side to navigate through different sections such as Users, Devices, Apps, Security, and Reports.
Perform Administrative Tasks:
- From the dashboard, you can perform a variety of administrative tasks. For example, to add a new user, navigate to the Users section, click on Add New User, and fill in the required details.
- To manage devices, go to the Devices section where you can view and control devices that access your organization’s data.
Customize Settings:
- Customize settings according to your organization’s needs. For instance, you can set up security policies under the Security section to enforce two-factor authentication or manage data loss prevention.

What are roles in Google Admin console for?
To grant another user administrator privileges, the most straightforward method is to assign predefined administrator roles. Each role comes with specific privileges that collectively enable you to carry out various common system administrative functions.
For instance, one role handles user account management, another oversees group management, still another handles calendar and resource management. You can assign multiple roles to grant all the privileges associated with them.
What is the difference between each role in Google Admin console

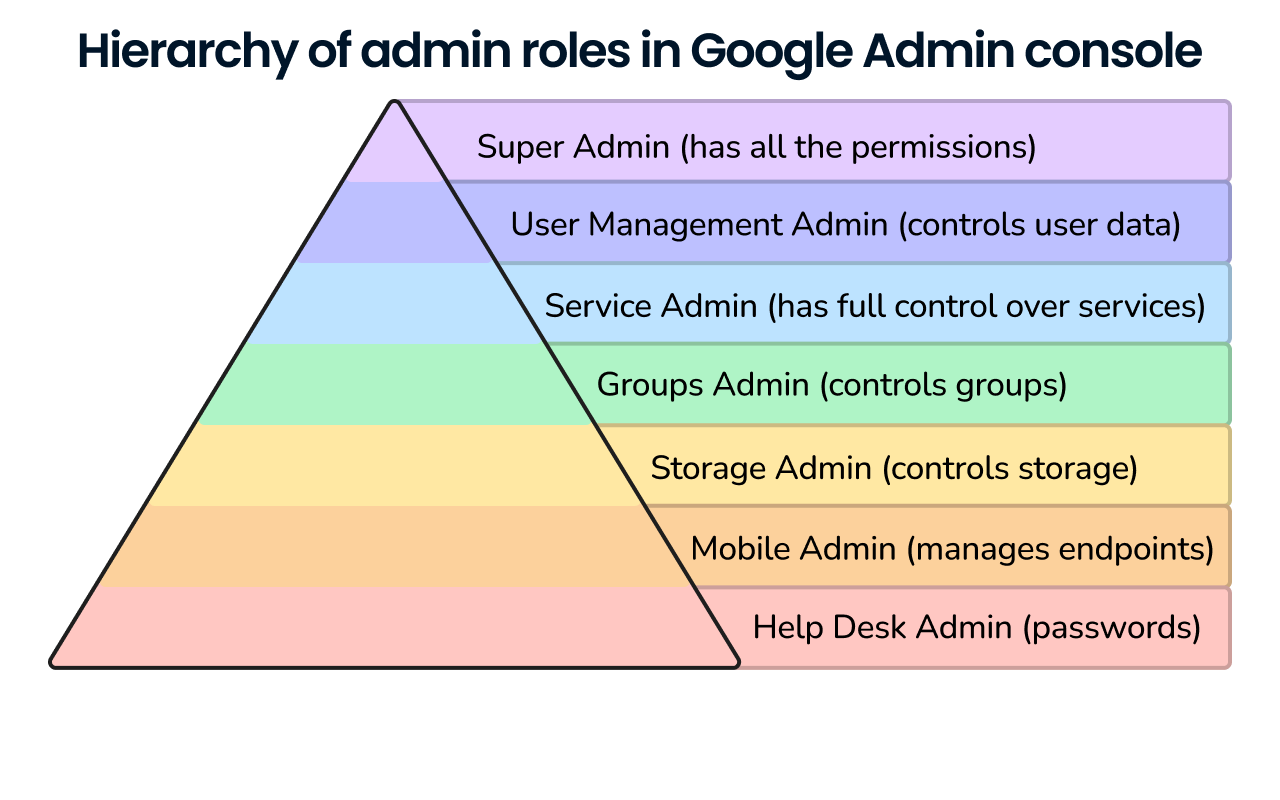
Super admin
Super admin is the role that can control every aspect of your Google Workspace. The users that are assigned to this role have full access to all user data, including calendars, event details, etc. Among the key abilities of super admin are:
- Creating and assigning administrator roles
- Creating, updating, deleting organizational units
- Managing other super admins, including changing passwords
- Accepting the Terms of Service for a product
- Restoring deleted users
- Turning on 2-Step-Verification
- Installing Google Workspace Marketplace apps
- Full management of Services
- Managing Google Calendar
- Using the data migration service
- Domain management
Groups Admin
The role of Group Admin has full control over Google Group in your Admin console. Group Admin has the permissions to:
- Access user profiles and your organization’s structure
- Create new groups within the Admin console
- Manage groups members that were created in the Admin console
- Adjust access settings for groups
- Remove groups from the Admin console
- Read organizational units
User Management Admin
User management admins have a broad number of actions and permissions. This role has the permission to perform tasks from Admin and Admin API. The administrators of this level can:
- View organizational units
- Create, update, move, rename, suspend, and delete users
- Reset passwords and force password change
- Control user aliases
- Manage user security
Help Desk Admin
- Viewing organization units
- Viewing list of users
- Updating and reseting passwords
Services Admin
- Read organizational units
- Control different levels of services
- Manage the settings and permissions of various applications (including core Google apps)
- Manage the directory settings
- Create, edit, and delete Calendar resources
- Manage Chrome and mobile devices listed in the Admin console
- Use the alert center (full access)
Mobile Admin
- View organizational units
- See users in the domain
- Approve devices
- Manage apps
- Block or wipe devices and accounts
- Set device permissions
Storage Admin
- Seeing organizational units and users
- Controlling storage settings
- Managing drive and docs configurations
- Setting storage limits.
- Opening the Accounts report and the list of shared drives
- Seeing details of new Google Sites
- Changing Docs Templates
How to assign roles in Google Admin console
On Google Admin console you can assign a huge number of users to various roles depending on their responsibilities. Giving full access to everyone in your organization might cause a huge number of problems. Thus, by assigning specific roles to the selected users you will be able to control each user’s permissions.
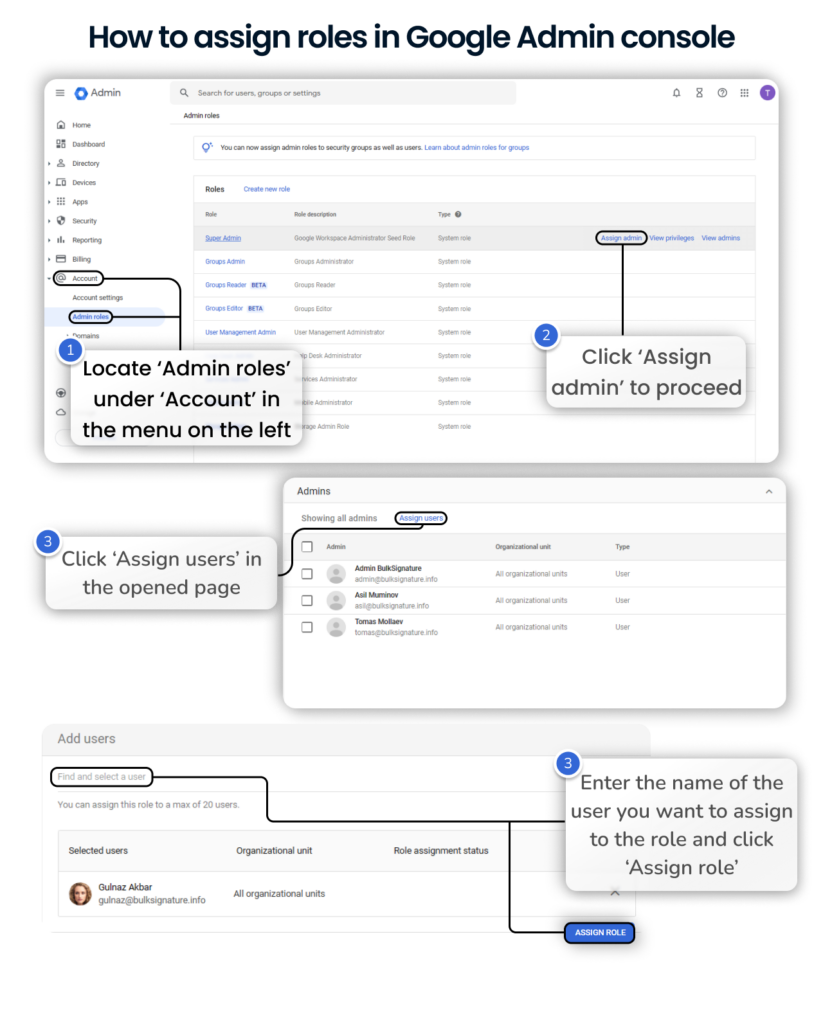
Before assigning or creating the roles for your users you need to make sure you have necessary permissions. To assign a prebuilt or custom roles you need to have super admin privileges. To begin the roles assignment, follow the steps:
- Access your Google Admin console (admin.google.com).
- In the menu on the left, locate ‘Admin roles’ under the Account section.
- In the opened page hover over the role and click Assign admin.
- In the opened page click on Assign members in the top menu.
- Enter the name of the user who you want to assign to the role.
- Hit Assign role.

How to create, edit and delete custom admin roles
In some cases you may end up not being able to use the pre-built admin roles due to their limitations. Google Admin console allows you to create 750 custom roles that meet your needs.
- Access your Google Admin console (admin.google.com).
- In the menu on the left, locate Admin roles under Account.
- Hit Create new role.
- Put in a name and a description if needed.
- Click Continue.
- In the next step, check boxes to enable the privileges for the role.
- Click Continue.
- Review the selected privileges and hit Create Role.
Custom roles editing is performed from the same section of settings.
- Access your Google Admin console (admin.google.com).
- In the menu on the left, locate Admin roles under Account.
- Click on the custom role you want to edit.
- Click Edit Role Info to change the description or the name of the role.
- Click Privileges to edit the permissions the role is supposed to have.
- Hit Save.
To delete a custom role, you need to keep in mind the following requirements:
- You can’t remove yourself if you are assigned to the role (SOLUTION: Ask another super admin to unassign you from the role)
- Every user must first be unassigned from the role before deleting it.
Follow the steps below to delete a custom role:
- Access your Google Admin console (admin.google.com).
- In the menu on the left, locate Admin roles under Account.
- Select the role you want to delete.
- Locate Admins assigned.
- Select all admins who are assigned to the role.
- Click Unassign role.
- Hit Delete role.


