Google Admin console provides you with an option to suspend users without deleting them. In this short guide, you’ll learn why you might need to suspend a user on Google Admin console, what is the difference between deleting and suspending users on Google Workspace, and what you need to do to suspend a user.
What is the difference between deleting and suspending users
Suspending users in Google Admin console means that you can temporarily block a user’s access to your organization’s Google services. When you suspend a user:
- You don’t delete their data, emails, documents, calendars, etc.
- User’s collaborators can still access shared documents, calendars, etc.
- New email and calendar invitations are totally limited
One of the key advantages of suspending users is that the suspended users can always be restored. When you suspend a user, they won’t receive calendar invitation, files, etc. as long as they’re suspended. However, you should be aware that user license fees are applied to the suspended user. Thus, it means that you’ll still have to pay for the suspended users.
Deleting users on Google Admin console implies complete removal of all user data, including Gmail and data in other application. Thus, Google Admin console allow you to migrate the user’s existing email, set up forwarding for new messages, transfer data from Drive, Docs, Calendar, etc. When you delete a user, you should keep in mind that all data not selected for transferring will be deleted permanently within 20 days.
How to suspend a user in Google Workspace
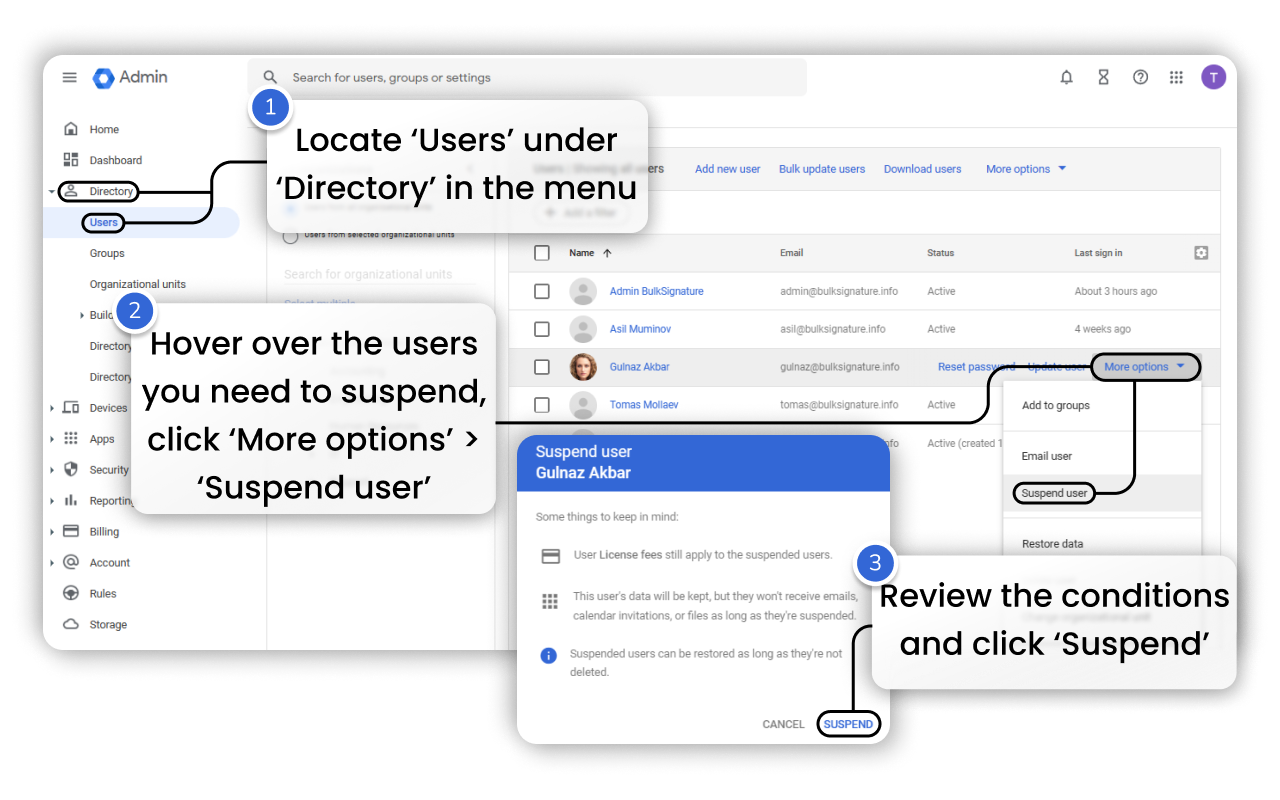
How to suspend a single user
Suspending a user in Google Workspace is a quick task that only requires you to have Google Admin privileges. To perform that you need to do the following:
- Access your Google Admin console (admin.google.com). Keep in mind to access it you need to have super admin privileges.
- In the menu on the left, locate Users under Directory.
- Hover over the user you would like to suspend.
- Locate More options on the right.
- Click Suspend user.
- Review the conditions and hit Suspend.
How to suspend users in bulk
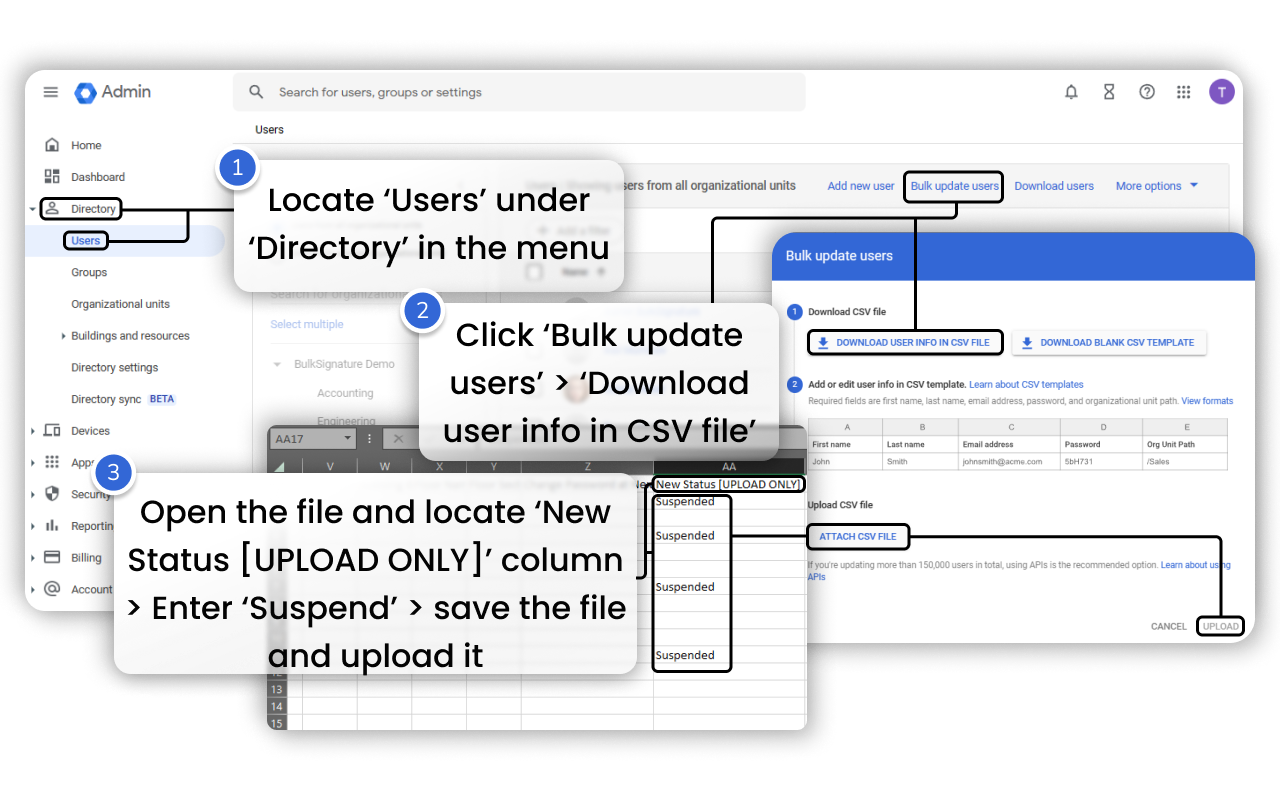
Google Admin console also allows you to suspend multiple users in bulk. To do that you need to use a CSV file. Follow the steps to perform the bulk user suspension:
- Access your Google Admin console (admin.google.com).
- In the menu on the left, locate Users under Directory.
- Hit Bulk update user in the opened page.
- Click Download user info in CSV file.
- Open the file and find New Status [Upload Only].
- Enter Suspended next to the users you need to suspend.
- Safe the CSV file.
- Upload the file to your Google Admin console.
How to restore a suspended user in Google Admin console
Google Admin console allows you to restore the suspended users. To reactivate a suspended user in Google Workspace, you need to follow the steps:
- Access your Google Admin console (admin.google.com).
- In the Admin console, open the menu on the left.
- Locate Users under Directory.
- At the top of the users list, click Add a filter and choose User status.
- Check the Suspended box and hit Apply.
- Hover over the suspended user and click More options > Reactivate.


